Showing posts with label Dinner. Show all posts

Wednesday, January 14, 2015

Sausage & Bacon Tortellini Bake

Yesterday, day two of mat leave sans husband, my lovely sister came over to visit.
It gave me a chance to have a shower, play with the dog outside, and prep something for dinner. 
She also brought McDonalds which was highly appreciated. 

You might think that making dinner when you're spending an entire day looking after an infant who doesn't nap for very long at any given time would be the last thing you'd want to think about doing. 
But I actually enjoyed getting into the kitchen and putting a little thought into what we would eat.
It was a nice return to normal life for a bit. 

While browsing Facebook during our early morning feed, I came across a Martha recipe for a bacon tortellini bake. 
Since we had tortellini in the freezer, and since the dish was relatively quick and easy to prepare, I decided that making this would be my goal for the day.

It was, true to its word, quick and easy.
And delicious.


  • In a pan, add 3 or 4 sausages to 1/3 cup water and heat, covered, over medium-high until the sausages are cooked through, about 5-10 minutes. Remove sausages and allow to cool. Drain water from pan.
  • In the same pan, fry 1/2 onion, diced, with 4 strips of bacon cut into strips. Add in 2 cloves of garlic, diced.  Add sausage back to pan. Cook until the onions are translucent and the bacon and sausage is cooked. 
  • Add in 2 tbsp flour and stir to combine. Pour in 1/2 cup milk and stir again to combine. Add salt and pepper to taste. Add in 1 pkg tortellini and 1/4 cup parmesan cheese and allow mixture to thicken over medium heat for about4 minutes. 
  • Pour into an oven safe dish and sprinkle top with more cheese (parmesan or whatever you want). Bake at 350 for about 10 minutes, until warm and the cheese is browned. 
  • Then serve and enjoy!
Easy enough to make with a newborn (and someone to keep said newborn entertained)!


Tuesday, March 25, 2014

The Hunter's Series: Hunter's Pie (Featuring Guest Writer John!)


I've wanted to have a guest writer take over my blog for a long time and finally the dream has come to fruition!

Last week John cooked up two wonderful meals: a duck & goose stew (which I refer to as duck-duck-soup) and a variation on sheppard's pie called hunter's pie, made with beef, deer, and peameal bacon.
It was delicious. 
We ate the pie for dinner (and lunch) so I only have pictures of the pie so that will be the recipe up today.


Anyway, to tell you how he made his hunter's pie, here is John!


Hello everyone. This hunting season for me was pretty short, as I only got out once during duck and goose season.  But thanks to the kindness of my hunting buddies Shawn and Kris, we had a pile of different game meats in our freezer. Among them was deer, moose, elk, Canada goose, and a few different types of duck.  So first on the menu of wild game food was my take on Sheppard's Pie- a Hunter's Pie.


It's really simple to make, and you can substitute the ingredients used with pretty much anything you'd like.  This is very meat-heavy though, so if you're hoping for a vegetarian alternative you're out of luck.  Maybe in the spring I'll do another post about foraged wild edible plants though- spring fiddleheads are pretty tasty.
So central to this recipe is meat: Peameal bacon, ground beef, and ground venison.  Venison has a stronger, more gamey flavour than beef, so combining half beef and half deer mellows out the flavour a bit and makes it more accessible to people that would otherwise be scared off by eating deer.
I started off by cutting the bacon in rough chunks, and sautéing them in a pan.  Then I added onion, minced garlic, cracked black pepper and chilli flakes.  When the onions turned translucent, I added the ground meats.  When they were fully cooked I drained off some of the liquid to prevent the pie from being too soggy.


Ground beef and deer in the pot.  The beef is the bright one, while the venison is more brown in colour.


While the meats were browning, I boiled and mashed some potatoes and a few sweet potatoes. I like the contrast between white fleshed potatoes and the orange of sweet potatoes, as it makes the pie look a bit more interesting.  I then added a bit of butter and a spoonful of horseradish to the potatoes, which makes them taste way better.

With the meat browned and the potatoes mashed, all that's left is layering this sweet concoction in a baking dish.  To assemble: meat on the bottom in a layer about 2cm thick, sprinkled with corn and peas (the canned stuff works great), then smooth on the mash to about 2cm thick as well. Toss it in the oven for a while and you're set.


Butchering (ed note: in my mind I'm going to just read this as 'hunting'. Still love you John!) any large game animal like deer, moose, or elk leaves you with a lot of ground meat. This is a great way to use up all that delicious, flavourful meat and clean out your freezer.  Anyone who hunts knows how important it is to use as much of the animal as possible, and this is an easy and tasty way to accomplish that.
Thanks for reading my wildly speculative ramblings, and thanks to my lovely wife for letting me contribute to her blog.

Up next in the hunter' series: Duck-Duck Soup


Sunday, March 9, 2014

Healthy Chicken Fried Rice


On Wednesday night I wanted to make a nice dinner but I realized we had very little food in the house.
I knew I would use the roast chicken my dad had so kindly brought us, so I scoured the cupboards and the fridge for other items to go with it.
I happened upon a bag of brown rice from when I had tried to go on a cleanse to cure my bloating.
I decided I would make a healthier chicken fried rice entree.


It's really easy to make, much healthier than the kind you'd get at a Chinese restaurant, and you can customize it to include the vegetables you like. 
  • Make your brown rice. Follow the instructions on the bag but you can generally expect to follow the 2:1 ratio of water to rice. Also the rice I made takes 30-35 minutes to cook so do this first.
  • If you don't have pre-cooked chicken (as I did), now would also be a good time to get that chicken in the oven.
  • In a pan over medium heat, sautee 1 white onion until translucent (or not if you like a little more crunch) in 1 tbsp olive oil. Add in 1 stalk of celery, diced, broccoli, and fry until broccoli has softened. Add in spinach. Reduce heat to low and cook until spinach is wilted. Again, feel free to add in whatever veggies you want. 
  • Push the veggies to one side. Crack 1-2 eggs (depending on how many you're feeding and how much you like eggs) into the empty pan space and scramble them. 
  • Mix your cooked brown rice into the veggies and egg. Add in your chicken, cut into appropriately sized pieces, and mix it all together.
  • Serve and enjoy.
That's it.
It's not a spectacularly fancy or original recipe but it was really good for something I made on the fly. 
Try making your own (and healthier) version of some of your favourite take out items.

Thursday, February 27, 2014

Julie & Julia & Jamie: Chicken Fricassee

For Valentine's Day my wonderful mother got me the movie Julie & Julia as well as the star item of the movie: Mastering the Art of French Cooking - the Julia Child cookbook.


After browsing through the many sections and trying to decide what I wanted to make first, I finally settled on a chicken dish: chicken fricassee.
We had friends over for dinner on Tuesday night so it was the perfect opportunity to try out a new recipe.
Chicken fricassee is kind of somewhere between a stew and a chicken with a creamy sauce poured over it. 
It's delicious and I highly recommend it.


  • Season chicken on both sides with salt and pepper. Preheat a Dutch oven or other large heavy pot (I used a soup tureen) over medium-high heat. Add 2 tablespoons butter and 1 tbsp olive oil to the pot. Place the chicken (Julia says use a whole chicken cut into it's parts, I used 4 chicken breasts with bone in and skin on), skin side down, being careful to not crowd the pot. Turn the chicken and continue frying until golden brown on both sides, about 10 minutes then transfer to a plate. Repeat with remaining chicken.
  • Reduce heat to medium, and add mirepoix (1 white onion, 1-2 carrots, and 2 stalks celery, all cut up as desired) to pot, scraping up any browned bits with a wooden spoon. Saute, stirring occasionally, until soft and golden brown, about 8 to 10 minutes.
  • Add 8 ounces mushrooms, and cook until mushrooms darken, become glossy, and begin to release liquid, 4 to 5 minutes. *Or, if you're like me and dislike cooked mushrooms, skip this step completely.
  • Stir in 2 tbsp flour, and cook until flour is absorbed by vegetables, about 1 minute.
  • Add 1 cup dry white wine to the pot and bring to a boil, stirring until liquid just thickens. Add 3 cups chicken broth, and stir.
  • Place chicken, skin side up, in a single layer on vegetables. Tie parsley sprigs, thyme sprigs, and bay leaf together and add to the pot. Bring to a boil, then reduce to a simmer, covering partially. Cook for 30 to 35 minutes (or until internal temperature of thickest part of chicken registers 165 degrees). 
  • In a separate bowl whisk together 2 egg yolks and 1/4 cup heavy cream (I used 18%). Whisking constantly, pour 1/2 cup cooking liquid, 1 tablespoon at a time, into this liaison (sauce thickener) to temper it. This will ensure the eggs don't cook and scramble. Stir the now tempered liaison into the pot.
  • Add tarragon, 1 tsp lemon juice, 1 tbsp butter and a pinch of nutmeg. Bring to a simmer, stir gently to combine, and serve.

This is what it looks like on the Martha website for reference.
I forgot to take pictures during the cooking process so this is what it looks like while it's cooking and then my picture of it is the plated finale. I served mine with rosemary and olive oil roasted Parisian potatoes. 
I had to rush home to make dinner because I had spent the day learning.
Learning how to take blood and how to start IVs.


I was pretty successful on the dummy arm so here's hoping I have just as much luck on real people!

Sunday, January 26, 2014

Potato Pierogies

For some reason yesterday I was intensely craving pierogies.
Actually I know the exact reason. The cook where I work had made them for our patients for lunch and they looked phenomenal.

So I had to have them.
Usually if we have them we eat them as a breakfast food, fried up from our store bought frozen stash with bacon and onions.
But I wanted to make my own. So I did!
They're quite easy to make and considering I've never attempted them before and they turned out not too badly, I'd say they might be foolproof.

The only thing I'd fix for next time is that I'd either add more filling or make my circles smaller or the dough thinner as I ended up cutting off and not eating a lot of the outer edges.

Also I'd add bacon.

Always add bacon.


(recipe loosely adapted from Martha Stewart's potato pierogi recipe)

In a mixing bowl, lightly whisk 1 egg. Add in 2 tbsp sour cream and mix together.
Mix in 1 cup milk and 1 cup water
Add in 5 cups of flour, one cup at a time. Knead the dough for 8-10 minutes until elastic.
Place dough in a lightly floured bowl and cover with plastic wrap.

Bring to a boil a pot of salted water. Boil 10 potatoes until tender when pierced with a fork. 
Drain water, add in 1/2 cup cream cheese & 2 tbsp butter and mash together.
*I would also highly recommend adding in crumbled bacon here, however I didn't have bacon on hand (I know, how did that happen!?) so I won't include it in this recipe.

Roll out the dough on a floured surface.
Cut out circles and place a dollop of your potato filling in the center. 
Pick up each circle of dough in your hand and press the edges together to seal. You can scallop the edges with a fork for a fancier look.


Bring a pot of salted water to a boil. Drop pierogies in and allow them to cook and rise to the top. Allow them to cook for about 2 minutes more once they've floated up. Remove from the pot and drain off excess water.

Heat a frying pan and melt 2 tbsp butter.
Cut 1/2 onion and 1 clove garlic and cook until translucent.
Add in pierogies and cook until crisp and browned.

Serve with a dollop of sour cream & enjoy! 

Tuesday, September 10, 2013

Seafood-phobes: There's Hope Yet

As you may know, I am not a fan of seafood.
I've tried.
I will eat shrimp, crab, scallops and lobster on occasion but they're never my first choices.
 
Yesterday for dinner I was feeling kind of sick of the standard chicken/beef dishes I've been making.
I decided to venture outside my comfort zone a little and buy some fish.
I'm trying to up my protein intake a bit and fish is great with all it's protein and omega 3s and 6s.
While perusing the frozen section I came across these little beauties by Cedar Bay:
 
I bought one of each, figuring if I was going to try to be a fish-phile I'd need something heavily seasoned, spiced, and flavoured.
I overcooked them a bit which (for me) turned out to be a blessing.
 
I actually enjoyed them.
The Sugar & Spice seasoning was delicious but I have to give the top award to the Applewood with Orange & Ginger flavouring.
It was delicious.
I ate salmon and didn't make a face once.
I even ate everything on my plate!
 
Maybe my palate is growing up?
 
For someone who hasn't liked seafood ever in their 28 years on this planet (save for the fishsticks I ate as a kid which doesn't count cause I was young and those things are so heavily breaded they couldn't taste bad) this is a miracle.
 
For anyone else who dislikes fish but wants to incorporate it into their diet: don't give up! There's hope!
 
Look for these cedar planked salmon packages in the frozen fish section.
There's a bunch more flavours on the website that - so strangely in my mind - I want to try.
 
Give them a try!

Monday, July 15, 2013

Meal Planning Made Easy

I stumbed upon this tumblr called 'Pretty Little Pieces' and fell in love with all of the pictures and printable ideas.
 
This one I thought I'd share, as I'm aways trying to organize my life.


The only downside is that there's only room for 4 meals, then you've got to print out another.
But 4 meals is probably as far in advance as I'd get in terms of planning & shopping.
 
Photo and PDF courtesy of prettylittlepieces.tumblr.com


Saturday, June 8, 2013

Red Velvet Cheesecake Minis

 
On Thursday night we had some friends over for dinner.
I obviously was quick to use it as the perfect excuse to break my cleanse.
I did, a little, and it was like heaven had been revealed to me.
Pita! Dips! Cheese! Pasta! *gulp* Cheesecake! Wine!
 
Our original plan was to have a lovely outdoor dinner on the patio and use one of our buildings rental BBQs. But ol' Ma Nature decided to veto that plan with rain and chillier than seasonal temperatures.
 
So we BBQ'd indoors!
 
On the menu was shiskabobs.
Chicken, orange peppers, onions, zucchini (some with muchrooms) and halloumi
& Spicy Italian sausage with yellow peppers and onions.
 
The appetizer was pita bread with 4 dips - hummus, tzaziki, spinach, and artichoke & asiago.
 
The sides were a pasta salad with a roasted red pepper & artichoke tapenade and a caprese salad.


Then for desert, since I was breaking my cleanse, I wanted to get as decadent as I could.
I made mini cheesecakes with a red velvet cake base. I tinted the cheesecake pink to go with the red.
They were pretty good but I used a boxed red velvet mix and it wasn't as rich as I was hoping for.
Could have been my fault for only making 1/3 of the box and probably messing up the ratios of ingredients a bit.
 
 
Anyway I won't post the recipe because all you need is a recipe for Red Velvet Cake like this one, and a recipe for Cheesecake, like this one.
 
Mix 'n' match with any and all of your favourite deserts and flavours.
 
In other news, I decided today that I couldn't go back to the sparse diet of the cleanse after allowing myself such indulgence. I did well during the day at work, fruit for breakfast, brown rice and veggies for lunch. But when I got home to the left overs from dinner I devoured them.
 
And subsequently am still - almost 12 hours later - dealing with the consequences.
I'm bloated and gassy and crampy and uncomfortable.
 
All signs seem to point to dairy though as the source of the trouble.
I did have cheese, dairy based dips, chocolate, and a mug of coffee that was easily 1/5 cream.
 
I think I'm lactose sensitive.
I won't say intollerant because I think I have to have a fair bit of it to make it an issue.
 
So back to the cleanse.
Tomorrow/today I plan to let my digestive tract have a break and then slowly start to include dairy but not so much that it gives me trouble.
 
But there's a good chance I'm stopping at Tim Horton's in the morning to get a donut.


Saturday, December 8, 2012

Restaurant Review: The Burger Cellar

A little more than a week ago John and I went out for dinner to celebrate the end of my 8-shifts-in-a-row.
We decided to try The Burger Cellar, a restaurant in the neighbourhood that we'd been meaning to check out for awhile.
After making the waiter come back several times we finally decided on a wine. We went with a pinot noir from Kacaba.
The selling point was the winery - it was one of the ones that we visited during our Niagara honeymoon weekend.
It wasn't the Cab Franc that we spent $45 on but this bottle was still good (and about the same price, thank you restaurant mark-ups). 

 
Feeling like I needed to live large with my upcoming big pay cheque, we ordered the Duck Poutine ($11) to start.
It was, in a word, phenomenal.
The duck was tender, the cheese curds and the gravy were both amazing.
The dish didn't last too long once it hit the table.
 
 
Having checked out the menu earlier, I was tempted by the write-up for the vegetarian option ($11):
"panko breaded golden fried patty of roasted red peppers, grilled zucchini, red onions, baby spinach, pumpkin, cream cheese, chick peas and kidney beans, topped with avocado and tomato relish and Woolwich Farm goat cheese"
 
It was really really good and very filling.
 
 
John opted for the meatier Burger Cellar Burger ($12):
"two-year old Bothwell smoked cheddar, apple cider bacon, sauteed mushrooms, chipotle BBQ sauce and a beer-battered onion ring"
 
And having taken a few bites from his I can confirm it was also delicious.
 
 
The place is lovely (we were seated right next to a fireplace) and the service was good.
I'd go back!

Monday, September 24, 2012

Chicken Cordon Bleu

One nice thing about having a real job (plural actually - jobS) is that I'm seeing my savings account creep back up to an acceptable level. And it's doing it faster than ever before.
Between my 2 nursing jobs I get paid every Friday. It's amazing.
At the place I work casually I've been doing my orientation shifts and they are unfortunately coming to an end next week, so I won't be guaranteed any hours.
And then the pay days will likely take a bit of a hit.

Until then I'm enjoying making money.
It sucks, though, because my moments of free time have been few and far between.
But I'm sure I'll be complaining that I'm poor when I'm sitting at home with no work.

I neglected to blog anything all of last week so this week I'm going to try to be better.

Over a week ago I found a recipe in Everyday Food for lighter chicken cordon bleu.
It being my night to make dinner, I got everything I needed and made it for us to enjoy on the balcony.

It's really really easy and looks and tastes like you put way more effort into it than you really did.


So inspired by Everyday Food, here's how to make
Lighter Chicken Cordon Bleu


 1. Preheat oven to 350 degrees. Cover baking sheet with tinfoil (this makes eating the melted cheese from a lot easier. Cleaning too). Cover the tinfoil with panko bread crumbs.
2. Butterfly 2 boneless, skinless chicken breasts. On one side of the opened chicken breast place 3 slices of lean ham. Cover with 2 slices of light swiss cheese.
3. Seal in the goodness by securing the butterflied chicken with toothpicks. Place chicken on the panko bread crumbs. Spray the top of each breast with cooking spray then coat with more panko bread crumbs.
4. Bake for about 30-45 minutes, until chicken is cooked. Then serve and enjoy!


Also: I've officially been married for one month as of today!
Happy one-monthiversary to my amazing husband.
I love you!

Friday, September 7, 2012

Balcony Dinner Series: Crispy Ginger Beef

In the past 2 weeks that we've been married, John and I have been taking turns making dinner and eating them out on the balcony.
It's been so nice, especially since I was practically never home last year (what with school, placement, and work) and this summer I was working til 9 every night. Nights where we could sit down to dinner together were few and far between.
And generally when we did get to have dinner together we would make something quick and eat it on the couch watching TV together.
Eating dinner on the balcony removes the distractions and lets us talk about our day and anything else we want to share.
It's also been a nice opportunity to get back in the kitchen and cook again.
 
John's favourite dish when w order Chinese food is crispy ginger beef. Feeling lazy one night I suggested we just order in chinese. We ended up just making something quick but it inspired me to find a recipe so that I could make it for John.
 
I put together an Asian-inspired meal, with wonton soup (my favourite), a turkey terriyaki stir fry (complete with bok choy), and crispy ginger beef.
The recipe is relatively easy (with the exception of frying the beef) and turns out absolutely delicious.
I used a package of mixed vegetables that I bought from an Asian vegetable market. Cabbage really works well with this dish.
I also cooked chow mein noodles to soak up the delicious ginger sauce.
 
Balcony Dinner Series
 
 
Turkey terriyaki stir fry

 
Crispy Ginger Beef
Here's the recipe I used
(from allrecipes.com)


You will need: 

  1. Place cornstarch in a large bowl. Add water gradually while whisking.
  2. Beat eggs into cornstarch mixture. Toss in beef and stir to coat.
  3. Pour 1 inch of oil into wok, heat until boiling hot, but not smoking. Add a quarter of the beef to the oil. Seperate with a fork and cook, stirring frequently, until crispy, Remove, drain on paper towel and set aside. Repeat until all the beef is cooked.
  4. Drain off all oil except for about 1 tablespoons and add carrots, (I also added cabbage and broccoli which I recommend) onion, ginger, and garlic in that order. Stir fry briefly over high heat.
  5. Combine last 5 ingredients and add to vegetable mixture. Bring to a boil and then add beef. Heat thorough and serve immediately
  6.  

You won't regret making this for dinner!
 

Friday, August 17, 2012

Restaurant Review: Amaya Bread Bar

On Friday night John took me out for my birthday dinner to a spot I've been wanting to check out for over a year now: Amaya. It's a self described 'neo-Indian' bread bar. 
I was not disappointed and even John, who is not the biggest fan of Indian food, really enjoyed our meal. 

So, here's what we ordered! 

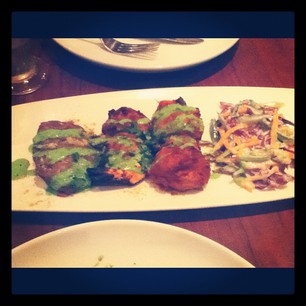
We started with the Mixed Grill for Two which consisted of  chicken tikka, beef kebabs, and tandoori prawns ($15.95) 


was delicious. Even the prawns were very good and I am not the biggest seafood fan.

Our main course consisted of butter chicken ($14.95), Alooo Gobi ($10.95) which is curried cauliflower and potatoes with cilantro, and sides of garlic naan bread ($3.95 for 4 pieces) and the jewelled basmati rice ($3.45)  


Everything got piled up on my plate and I went in for a big second helping.


I would highly recommend this restaurant. The food was delicious, the space is small and intimate, and the service was fantastic - we even got a starter on the house!
Make sure to make reservations, though, as the restaurant doesn't open until 4 and the kitchen closes at 9:30 pm. And the space is small so tables go quick!

The food was so good, in fact, that while at Yorkdale with my parents on Sunday we decided to check out the new food court and where did we end up eating?
Amaya.