Showing posts with label Desert. Show all posts

Saturday, June 27, 2015

Gluten Free Brownies, or, baking with coconut flour

Guess what I did?
I baked!
two items!

I've been invited to a baking party next weekend and since two of my friends are gluten intolerant, the challenge is to find a gluten free recipe.

I've baked with rice flour before and wasn't particularly wowed by it, but I pretty much substituted it exactly for regular flour which you can't always do.

I debated buying the gluten free all purpose flour but decided to be more adventurous and instead I bought coconut flour to experiment with.
Turns out you have to make a few adjustments to your recipe when using coconut flour as it tends to be more absorbent than your standard all purpose flour.

After scouring Pinterest, my first experimental recipe was for a lemon loaf. 
It sucked.
It tasted too eggy, which was no surprise considering it called for 6 eggs. 

I tried again.

Brownies.
A big winner.

There's a nice hint of coconut (there would have been more if I had used coconut oil and coconut milk as the recipe calls for) so if you like the taste of coconut, grab some flour and give this recipe a whirl.


  • Preheat oven to 350 degrees and line a brownie pan with parchment paper.
  • Over medium heat, combine 1/3 cup coconut oil1/4 cup butter and 1/2 cup honey until melted. In a heat-proof bowl, add 1/2 cup chocolate chips. Pour oil & butter over chocolate and allow chocolate to begin to melt, then stir until combined. 
  • Add in 1/2 cup coconut milk1 tsp vanilla, and 2 eggs
  • In a separate bowl, combine 1/2 cup coconut flour1 tbsp cocoa powder1/4 tsp baking soda, and 1/4 tsp salt. Mix into wet ingredients with a whisk to get rid of lumps.
  • Pour into brownie pan and bake for 25 minutes.  


Sunday, April 5, 2015

Birthday Baking Part 1: Salted Caramel

My dad's birthday is on Tuesday and we're planning a baseball-themed party.
I volunteered to be in charge of desert so I'm making an appropriately baseball-themed desert: 
Crackerjack Cupcakes (& cake balls)!

Because there are a few steps involved I thought I'd share and break the process down into two posts.
First up: salted caramel.

Be warned, this is DELICIOUS and you will have a hard time not eating most of this before you use it. 

Make extra.


(Recipe from The Brunette Baker)
Makes 2 cups.

  • Over medium-high heat, combine 1 cup sugar with 4 tbsp water and bring to a boil. Without stirring, allow sugar to boil until it turns a golden-amber colour - about 6 or 7 minutes. **Do not leave the stove as this colour change happens quickly** 
  • Remove from heat and carefully add in 1/2 cup heavy cream and 1 tsp vanilla. Do this carefully as the mix will bubble up. 
  • With a wooden spoon, stir in 3/4 cup room temperature butter and 1/4 tsp salt. Stir until butter is melted and incorporated.  Pour into a container and allow to cool. 
  • Dip everything in your kitchen into a spoonful of this sauce and try not to eat the entire jar. 

I want to make so much more of this sauce. 
So much more.

Save at least a cup of this for part two of the cracker jack cupcake recipe!


Tuesday, December 16, 2014

Gooey Layered Everything Bars

Maternity leave has so far been like a holiday. 
It probably helps that there is, as of yet, no baby who needs to be taken care of. 
I know my daily routine will be thrown up and flipped around in ways I can't even imagine once she arrives. 
Currently, after a terrible nights sleep, I get out of bed around 8-8:30 and have breakfast. Then the dog and I go for a long 90 minute to 2 hour walk in the park. Then we come home, she naps and I listen to Serial (the most amazing podcast - if you haven't gotten hooked on this yet, do it). 
Then I run errands, tidy up, think about dinner, etc. 

Last night I finally got around to baking some tea cookies (after having the dough sit in the fridge for about a week - the sugar cookie dough is still there begging to be baked) and I decided that today I would do a bit more baking. 

I did a quick search through Martha's recipes and found one that I haven't tried yet. 

So today's recipe is a fairly easy and delicious one, one that you can pretty much tailor to your tastes and one that would be well received by anyone you'd like to gift these too. 
And when it says gooey, it really means gooey.
Like, good-luck-getting-it-out-of-the-pan-in-proper-pieces gooey.


Gooey Layered Everything Bars


  • Preheat oven to 375 degrees. Place a layer of parchment paper in a bar pan.
  • Using an electric mixer or a pastry cutter, mix 3/4 cup butter, 1/2 cup confectioners sugar, 1 1/2 cup flour, 3/4 cup rolled oats, and 1/2 tsp salt. Cut or pulse until mixture resembles coarse meal. Pour mixture into pan and press evenly into bottom of pan. Bake for 20 mins until lightly browned and firm.
  • Remove from oven. Over crust, sprinkle 1 cup chocolate chips, 1/2 cup dried cranberries*. Drizzle with 1 can condensed milk, and 2 cups shredded sweetened coconut.  
  • Bake until coconut is golden, about 20 minutes. Then remove, let cool and serve!
*I substituted dried cranberries. Martha's recipe calls for 1/2 cup raisins and 1 cup walnut pieces.  


Saturday, December 6, 2014

A Merry Maternity Leave Christmas: White Chocolate Cranberry Fudge

Though my maternity leave officially starts on Monday, I worked my last shift on Thursday so I am done work for the next 10 months!

On the first day of mat leave my true love gave to me 
a project and a recipe
(it kind of rhymes)
(also in this case 'my true love' = pinterest)

If you want a very simple recipe for fudge, I have just the one for you!

White Chocolate Cranberry Fudge


  • Over low heat, melt 3 cups white chocolate chips with 1 300 ml can of sweetened condensed milk.
  • Once the chocolate has melted, remove from heat and stir in 1 tbsp vanilla extract and 3/4 cup cranberries (I used craisins). 
  • Pour into a pan lined with tinfoil. Allow to set in the fridge for 2 hours or until set. Then cut and enjoy!

The DIY project (which is also crazy easy if you have the necessaries) I'll post tomorrow.

We'll end with a baby update - 
37 weeks + 5 days today!
We're playing the waiting game now for baby E's arrival :)
Her official due date is December 22nd but she's fully cooked and could come any day now.

Baby Watch 2014 begins!


Thursday, September 11, 2014

Peach Cake

If there's been a lack of posts lately it's because I've been going to bed by 9 pm most nights. 
I was working quite a bit and also battling a gross cold. 
Sinus congestion and throat pain - oh my!
I'm starting to feel better, finally, but still tired. 
Something tells me I'll be tired almost constantly now for the next few years...

Inspired by a basket of peaches and a jar of amazing peach jam courtesy of a friend, I decided to put a fruity spin on a coffee cake recipe and make a peach cake. 

It's a good one. 
And a good way to use up those last-of-summer peaches. 


  • Preheat oven to 350 degrees.
  • For the crumble: In a bowl, mix together 1 3/4 cup flour with 3/4 cup brown sugar and 2 tbsp cinnamon. Cut in 6 tbsp butter using a pastry cutter or two knives, until the mixture is the size of peas. Set aside.
  • In a bowl, cream together 1/2 cup butter and 1 cup sugar. Add in 2 eggs and 1 tbsp vanilla. Mix in 1 cup of vanilla yogurt
  • Stir in 2 cups flour, 1 tsp baking powder, 1 tsp baking soda and a pinch of salt
  • Pour 1/2 of the batter into the bottom of a lightly greased loaf pan.  
  • Cut 3-4 peaches into slices and layer on top of the batter. Sprinkle with the crumble mixture. 
  • Top with the remainder of the batter. Spread on a layer of peach jam then top with the remainder of the crumble mixture. 
  • Bake for about an hour or until cooked through. 

Let cool, then slice, share with friends, and enjoy!


Monday, August 18, 2014

The Ultimate Brownie, or The Chocolate Chip Cookie Cheesecake Brownie

I haven't done any baking in a loooooong time. 
A long time.
And now that I have this wonderfully big, open kitchen, there's no excuse.

Spurred on by the colder weather we've been having as of late, I decided to turn on the oven and get to mixing.

A few weeks ago I bought a bag of cookie mix, having been craving a large, soft chocolate chip cookie that day. By the time I got home the craving was gone and the bag sat in the cupboard for awhile.
 
So.
What could I make with a bag of President's Choice The Decadent chocolate chip cookie mix?


What if I whipped up a brownie mix?


What if I layered the brownie mix over the cookie mix?


And what if I added some cheese cake mix, whirled into the brownie mix?


Well Jamie, I do believe you'd have The Ultimate Brownie: The Chocolate Chip Cookie Cheesecake Brownie.


If you want to make your own, here's how:

1. Preheat oven to 350. Mix chocolate chip cookies according to instructions on bag (your best bet is the kind that only needs butter and water. No raw egg means you can lick that bow clean without worry). I used about a 1/3 of my cookie mix to completely cover the bottom of the pan. 
2. Spread in an even layer along the bottom of a 9x9 pan, pre-greased with butter or cooking spray.
3. Bake for about 8 minutes, until set around the edges but not completely finished. Remove and let cool but don't turn the oven off. 

4. In a small microwave safe bowl, mix 3/4 cup chocolate chips with 3 tbsp butter and 2 tbsp vegetable oil (I substituted with olive oil cause it's all I had and it didn't affect the overall taste). Heat for 30 seconds then stir together. If not quite melted, heat for another 15 seconds. 
5. In a separate bowl, mix together 1 cup sugar, 1/2 cup buttermilk (or 1/2 cup milk + 1 tsp vinegar) , 2 egg whites, and 1 tbsp vanilla extract. Pour in the melted chocolate and mix until smooth. 
6. In 3 additions, mix in 1 cup flour, 1/2 cup cocoa powder, and 1 tsp baking powder. Mix until combined. Set aside 1/2 cup of this mix and pour the remaining brownie batter over the chocolate chip cookie, being careful to spread the batter around without ruining the bottom layer. 

7. In another bowl, mix together 1 pkg softened cream cheese, 1/3 cup sugar, 1 tbsp vanilla extract, and 1 egg. Use a whisk to smooth out the lumps. 
8. Pour evenly over the brownie batter then drop spoonfuls of the remaining brownie batter into this. Use the back of a spoon to swirl the brownie batter into the cheesecake layer. 
9. Bake at 350 for about 40 mins or until set. Allow to cool then cut and enjoy your slice of heaven. 


With this cooler weather I expect to be in the kitchen a bit more in the next little while so stay tuned for more recipes.

Wednesday, June 4, 2014

Rhubarb Tart

In celebration of our new garden, I decided to bake up a rhubarb desert.
We're growing rhubarb in the garden among the veggies and herbs and it's something I don't use nearly enough in my baking. 
Also we're going for dinner at our friends' place tonight so we volunteered to bring the desert. 


After a quick google search ('what parts of rhubarb will kill me?')* and a Pinterest search for recipes, I settled on a rhubarb tart with shortbread crust. 
The picture looked delicious and I'm sure the finished result with taste as good as it looks (in the picture on Pinterest, mine doesn't look super appetizing unfortunately).

*FYI - you can eat the stalks, just don't eat the leaves of the rhubarb plant. Those might kill you.


Rhubarb Tart 
(adapted from Taste of Home recipe) 


1. In a large saucepan bring 3 3/4 cups chopped rhubarb, 1/4 cup sugar, and 2 tbsp water to a boil. Reduce heat to medium and cook until the rhubarb is tender, string often. Remove from heat and allow to cool. Once cool, transfer to a blender and puree until smooth.
2. Meanwhile, mix together 1 cup flour, 1/2 cup quick oats, 1/3 cup sugar, and 1/2 cup cold cubed butter. Use a pastry cutter to blend until the butter is the size of peas. Pour into an ungreased tart pan with removable bottom and press into the bottom and up the sides. Bake at 350 for 18-20 minutes. 
3. In a small saucepan over medium heat, whisk 6 egg yolks, 1/2 cup sugar1 tbsp lemon juice and the rhubarb puree until blended. Mix in 5 tbsp butter and whisk until melted then remove from heat. Add in a few drops of red food colouring if you're not satisfied with the colour. 
4. Pour into the crust and bake at 350 for 12-15 minutes until the centre is almost set. Cool completely, then refrigerate for at least one hour . Then serve and enjoy!

Monday, April 21, 2014

Light, Sweet & Airy Pavlovas

A few weeks ago we had dinner at our friends' place and they made a delicious dinner for us.
Crepes with asparagus, mushrooms, raisins, and goat cheese. They were different from what we normally have and oh no good.
I don't know why we don't make savoury crepes more often.

We brought the desert to be good dinner guests.
Having made brownies the night before to satisfy my own craving, I decided to make something very different.
Both were somewhat soft and gooey in the middle with crispy shells.
Where the brownies were decadent and chocolatey, this second recent foray into baking was light, sweet and airy.

 The Pavlova.

Simple and easy with only a few ingredients.
They look much more elegant and time consuming then they actually are.


  • Preheat oven to 350.
  • Using an electric mixer, whip 4 egg whites with 1 tsp salt until stiff peaks form.
  • Add in 1 cup sugar in 3 stages and continue to whip until glossy. With the mixer still running, add in 1 tsp corn starch, 2 tsp vinegar, and 1 tbsp vanilla extract. Gently fold together.
  • Turn oven down to 250 degrees. On parchment paper, spread meringue out into 6 circles (or any other type of shape you want). Bake for 1 hour and 15 mins, then turn off oven and allow the meringues to dry out.
  • Serve with whipped cream and fruit. We served ours with fruit (blackberries, blueberries, strawberries, mango, peach slices, and purple grapes) that we soaked in a mix of peach shnapps and riesling. 

Keep these in mind next time you want to impress your guests with desert.
You can find the Martha Stewart recipe that I used here.

Tuesday, April 8, 2014

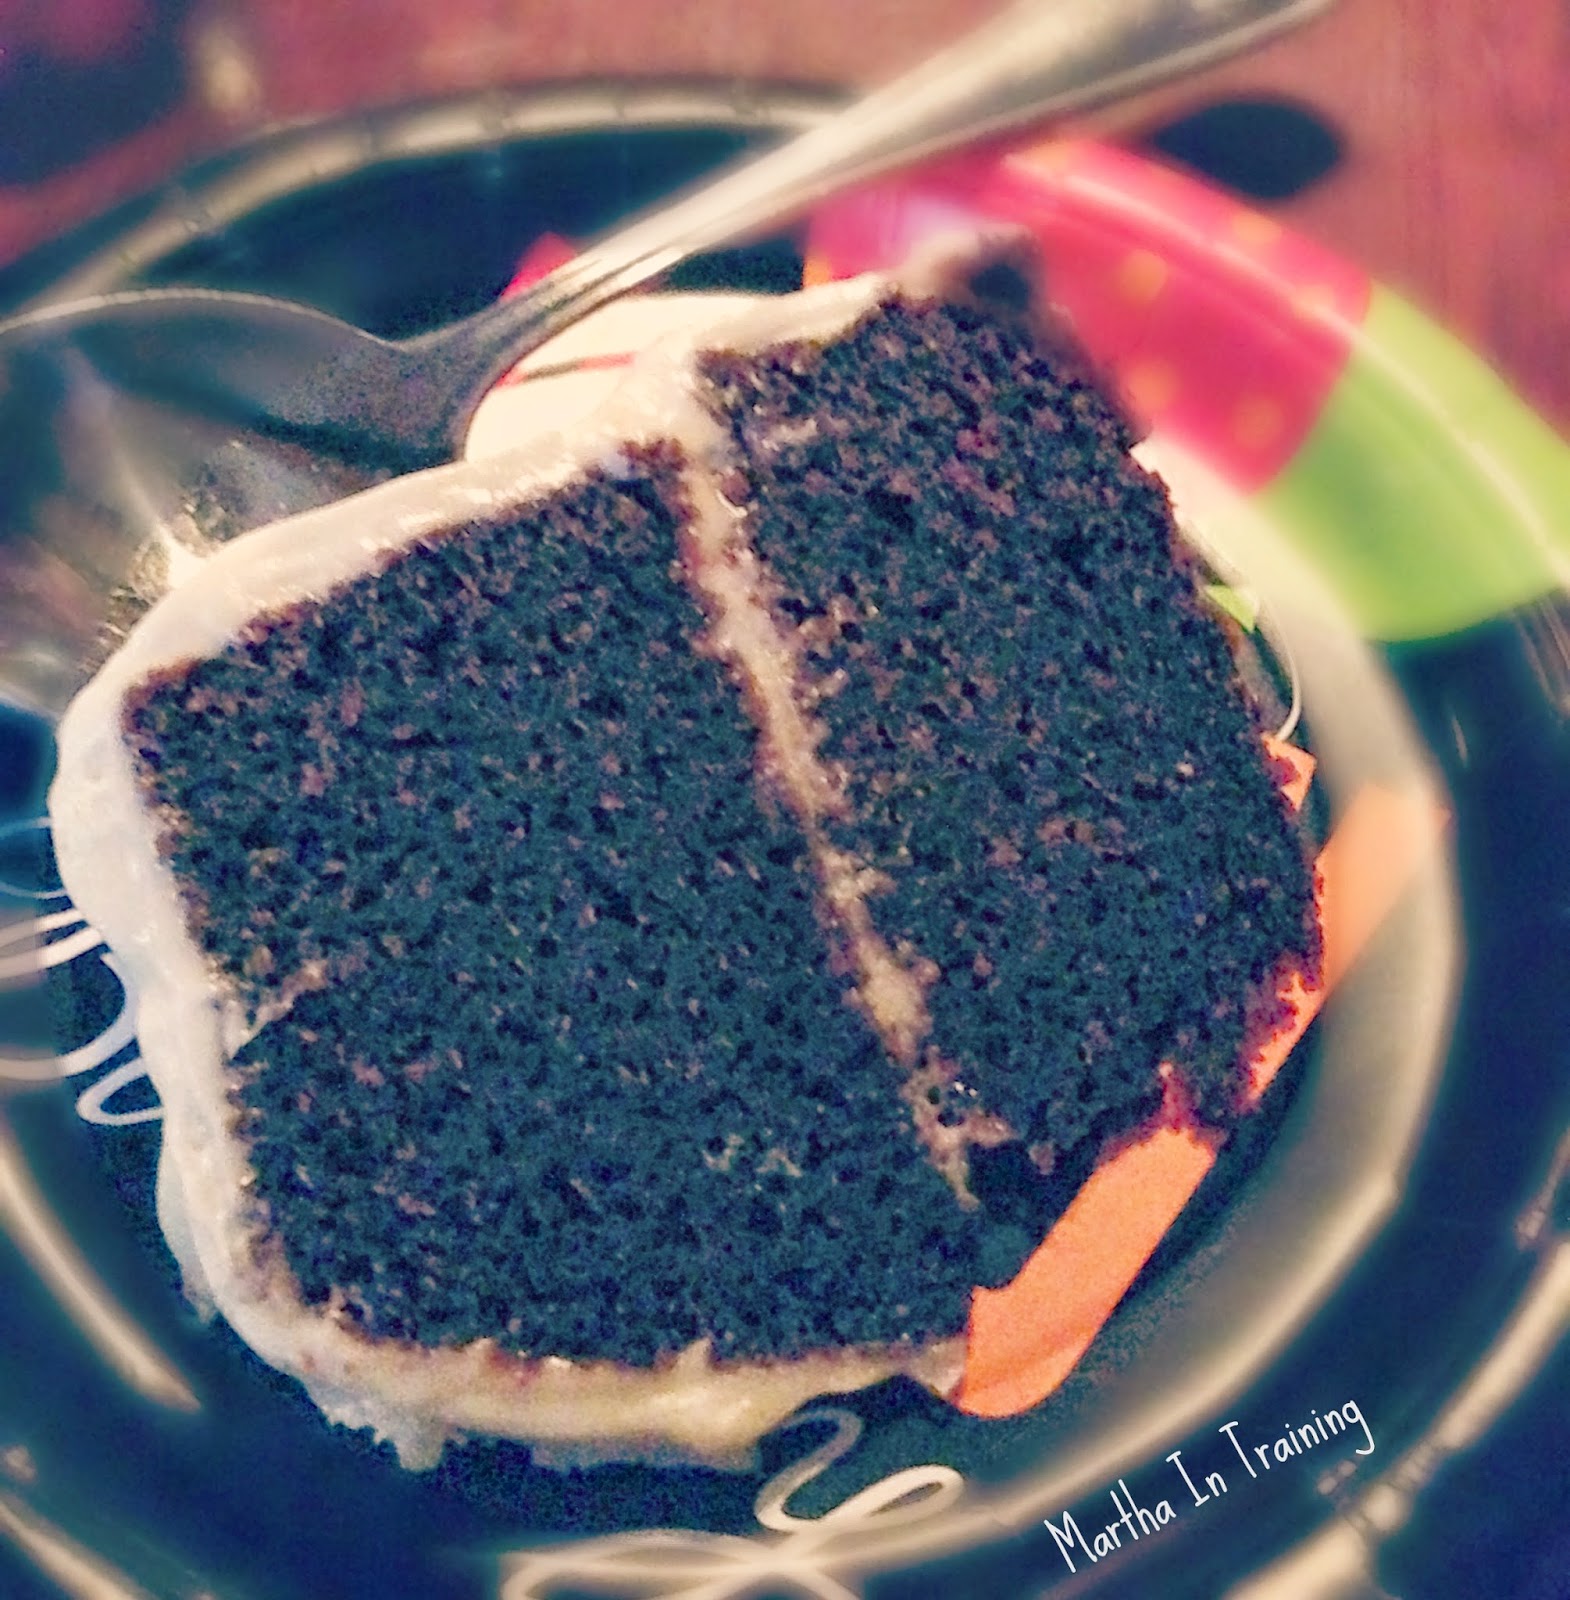
Guinness Chocolate Cake with Baileys Cream Cheese Icing

Yesterday was my dad's birthday. My sister and I took him out for lunch (the ever glamorous Harvey's but seriously those burgers are amazing) and then with a surprise trip to Canadian Tire for my dad to pick out a bicycle.
He was an avid runner for many years and recently due to knee troubles has had to stop. He's taken up cycling on a stationary bike in the basement but we figured this was a great way for him to take his new hobby back outside to the trails.
We celebrated later on at the pub where he plays and I baked him a cake that I had been eyeing on Pinterest.
It's one of the best chocolate cake recipes I've ever made.  The batter is delicious and the cake bakes up quite dense and moist. You can't really taste the Guinness but you can tell there's an extra ingredient in there.


  1. Preheat oven the 350 degrees.
  2. Grease cake pan (I used a deep bundt cake pan but the recipe suggests using 3 round pans) and line with parchment paper or dust with icing sugar.
  3. In a large saucepan (trust me, use a very large one), combine 2 cups Guinness (1 tall can) and 1 1/4 cup sticks butter over medium-low heat until the butter is melted. Remove from heat.
  4. Add 3/4 cup cocoa powder, 4 cups sugar, 2 tsp cinnamon, 1 1/2 tbsp molasses and whisk.
  5. In a small bowl, combine 3/4 cup sour cream with 4 eggs and 2 tbsp vanilla extract. Whisk together then add to the Guinness.
  6. In a large bowl, combine 4 cups flour with 5 tsp baking soda. Slowly pour the wet ingredients into the dry ingredients in increments, mixing well each time to prevent lumpy batter.
  7. Pour batter into the cake pan and bake for 90 mins for a deep bundt pan or about 45 minutes for 3 round cake pans - or until a knife inserted into the cake comes out clean.
  8. Allow cake to cool before removing from pan and allow for cake to be completely cooled before adding the icing.
To complement the Guinness I used Baileys Cream Cheese icing to top the cake.
I also cut my cake into two halves midway so that I could add in more icing. If you're using 3 cake pans you won't need to do that.
This icing isn't as thick as others so this is better used for more of a drizzle. But I still managed to cover the sides of the cake with it.


Baileys Cream Cheese Icing
  1. In the bowl of an electric mixer, blend 1 pkg cream cheese (softened), 1/4 cup butter (softened), and 1/4 cup heavy whipping cream. 
  2. Add in 3 tbsp Baileys. Continue to mix together until very smooth.
  3. Slowly add 2 - 2 1/2 cups icing sugar, adding until your icing has reached the desired consistency. Drizzle or frost your cake as desired.
Enjoy!
Happy birthday Dad 

Saturday, March 22, 2014

Quick & Easy (and delicious) Brownies


It's been too long since I've added any baking posts.
Partly because I haven't been doing much baking.
This week I got the bug and after making a nice dinner on Thursday night, I took a quick glance through my Canadian Living Baking book for a Brownie recipe.
I used the 'Super Chocolate Chunk Fudge Brownies'  recipe but left out a few steps & ingredients.
The result was a deliciously moist and soft brownie with that trademark flaky chocolaty crust on top. 
I seriously don't think I'll ever make brownies from a box ever again, or use another recipe.
This one is the best I've ever made.


  • Preheat oven to 325 degrees.
  • Over medium heat, melt 1/3 cup butter with 3/4 cup sugar and 2 tbsp water in a saucepan. Remove from heat and add in 3/4 cup chocolate chips (I used both sweet and semi-sweet chips), stir until melted. Allow the chocolate mixture to cool.
  • Whisk in 2 eggs, one at a time, then add in 1 tsp vanilla.
  • In a separate bowl, sift together 3/4 cup flour, 1/4 tsp baking soda, 1/4 tsp salt. Pour into the chocolate mixture and stir to combine. 
  • Pour into a greased brownie pan and bake for about 30 minutes. Let cool then cut and enjoy.


Tuesday, January 28, 2014

Choux Pastry for cream puffs // profiteroles // eclairs // etc

Ah, days off.
After working this past weekend, I'm happy that I only have 3 shifts to work this week. 

I started off the day by making responsibly adult decisions, namely eating Doritos for my immediate breakfast (because if I take my multivitamin on an empty stomach I get really nauseous... is how I justified that). Then I watched Let's Make a Deal, followed by the Price is Right while cuddling with Reese on the couch because the dog and I needed to thaw our toes from our walk in the park. 

Then I remembered that I had found some interesting new chocolate bars at Shoppers Drug Mart that I wanted to sample.
One is filled with red velvet cake ganache, the other with bits of potato chips and bacon. Imitation bacon, yes, but I'm sure that's for health purposes.
Neither disappointed.


Feeling in the mood for something French I decided to whip up some choux pastry for either cream puffs or profiteroles (still to be decided).
Choux pastry is the base for all things delicious: the cream puff, the profiterole, the croquembouche, the eclair, the gougere, the beignet, the cruller . . . 
 
I've made it 3 or 4 times and I've always had great results. 
The choux are light and airy and have a mild taste which allows for the other flavours you combine them with to take centre stage.
 
The recipe I use is courtesy of Williams Sonoma and it takes all of an hour (give or take) to make these delicious deserts (add more time for the cream and/or chocolate sauce).
 
Years ago I posted the recipe for choux pastry. 
Rather than link you to it (which you can get to by clicking on the W-S link above), I'm just going to break it down for you again.


  • In a pot over medium heat, bring to a boil 1/2 cup milk and 1/2 cup water, 6 tbsp butter and 1/4 tsp salt.
  • Remove from heat and immediately stir in 1 cup flour using the back of a wooden spoon. Continue mixing until the dough pulls away from the sides of the pot.
  • One at a time, whisk 4 eggs and add into your pate a choux paste, mixing after each addition to combine. Here, for the sake of my weak, tired arms, I put the paste into the bowl of my electric mixer and blend it all together to make it smooth and workable. Let the paste cool for about 10 minutes.
  • Preheat oven to 425. Transfer dough into a piping bag (or a ziplock bag which works just as well) and pipe your desired shape onto a parchment or tinfoil lined baking sheet. Bake for 15 minutes. Remove pan and cut a small slit in the side of each pastry.
  • Turn the oven down to 350. Allow pastries to bake for another 5 minutes, then leave the oven door open a bit and allow the pastries to dry out for another 15 minutes. Remove from oven and allow to cool.
  • You can follow up by filling the pastries with cream or custard or cheese and/or dipping them in a chocolate sauce - depends what you have in mind for your choux pastries!
Enjoy deciding what to do next with your fancy, light as air choux!
 

Friday, October 11, 2013

Pumpkin Cupcakes with Maple Cream Cheese Icing

*Note: as soon as I can get my phone to connect to the internet I'll be posting an even tastier recipe for pumpkin-inspired cupcakes*
 
Moving on to the tried and true, cupcakes were the obvious next choice.
I did try to make pumpkin cream cheese truffles but they turned out kind of icky and I didn't like the way they tasted so they got wasted.
Yep. That rhyme just happened.
Anyway, I made a batch of mini cupcakes and I have to say the maple cream cheese icing is so good. I cleaned the bowl (a luxury I often pass up as it's John's favourite part but - lucky me - he wasn't home when these were made so the bowl was allllll mine).


recipe from sweetopia.net (where there is also a great tutorial for fondant pumpkins)
 
For the cupcakes:
  • 1 cup all-purpose flour
  • 1 teaspoon baking powder
  • 1/2 teaspoon baking soda
  • 1/2 teaspoon salt
  • 1 teaspoon ground cinnamon
  • 1/2 teaspoon ground ginger
  • 2 large eggs
  • 1 cup canned pumpkin purée
  • 1/2 cup granulated sugar
  • 1/2 cup light brown sugar, lightly packed
  • 1/2 cup vegetable oil
For the icing:
  • 1 block cream cheese, at room temperature
  • 1 cup unsalted butter, at room temperature
  • 2 tbs real maple syrup
  • 2 cups icing sugar
Instructions
    For the cupcakes:
  1. Preheat the oven to 350 degrees. Line muffin tin with paper liners.
  2. Sift together the flour, baking powder, baking soda, salt, cinnamon and ginger, into a medium bowl.
  3. In a larger bowl, whisk together the eggs, pumpkin purée, granulated sugar, brown sugar, and vegetable oil. Add the flour mixture and stir until combined.
  4. Divide the batter among the muffin tin and bake for about 20 minutes, until a toothpick inserted in the center comes out clean.
  5. Set pumpkin cupcakes aside to cool completely. These are delicious frosted with cream cheese icing or just as is!
  6. For the Icing:
  7. Cream the cream cheese, butter and maple syrup in the bowl of an electric mixer fitted with the paddle attachment. Slowly add the icing sugar and beat until smooth.
  8. Once your cupcakes are cool, ice them with a butter knife or large piping bag and tip of your choice.

Friday, September 27, 2013

Pumpkin Spice Cinnamon Rolls

Continuing on with my desire to bake everything pumpkin, I left the world of bread and moved to another breakfast-y option, one which I have experimented with before.
 
Cinnamon rolls!
 
The pumpkin gave it a nice almost savoury flavour but the cream cheese and the white chocolate chips I added gave it the sweet edge one normally expects in a cinnamon roll.
 
Worth giving a try and this recipe would perfectly compliment a pumpkin spice latte.


You will need:
 
  • package package fast-acting active dry yeast
  • 1-1/4 cups White Whole Wheat Flour
  • 2 cups all purpose flour
  • 1 teaspoon salt
  • 1 tablespoon sugar
  • 1 teaspoon pumpkin pie spice
  • 2/3 cup warmed almond milk (120 degrees) *I used vanilla soy milk
  • 1 tablespoon earth balance butter spread
  •  1 egg
  • 3/4 cup pumpkin puree, fresh or canned
  •  
    Filling:
  • 1/2 cup brown sugar
  • 1 teaspoon cinnamon
  • 1/2 cup chopped walnuts
  • 1/4 cup raisins
  • 2 tablespoons butter
  •  
    Instructions
     
    In a large bowl, stir yeast, white whole wheat flour flour, 1 cup of all purpose flour, pumpkin pie spice, sugar, and salt together.

    In separate bowl, mix pumpkin puree, butter, almond milk and flaxseed meal mixture together. Pour into dry ingredients and stir until well blended. Turn out onto counter coated with some of the remaining flour. Knead the remaining flour into the dough until it is used up and you have a smooth, elastic dough.
     
    Put dough into a bowl coated with cooking spray and lightly spray the top of the dough. Cover with plastic wrap and set in a warm place to rise. Let rise until doubled, about 1 hour.
    Combine the brown sugar, cinnamon, chopped walnuts and raisins in a small bowl, set aside. Transfer the risen dough to a work surface, and pat or roll it into a 16" x 12" rectangle. Spread softened butter over dough and then sprinkle with the sugar mixture.

    Roll the dough into a log the long way. Next, cut the rolls into even slices Place slices in a greased 8 inch squar baking pan sprayed with cooking spray. Cover with plastic wrap (not tightly) and let rise until almost doubled, about 45 minutes. Bake at 350 for 30-40 minutes until they turn golden brown across the center.

    Remove from oven and let cool about 15 minutes. Drizzle with white chocolate chips and cream cheese icing.


    Wednesday, September 25, 2013

    Pumpkin Spice Bread with Cream Cheese

    This week I've been baking up some pumpkin recipes. Some have worked quite well, others.... ended up in the garbage.
     
    The first that I came across was one that reminded me of an autumn version of banana bread.


    • Preheat oven to 350F; lightly grease 3 mini loaf pans with butter.
    • For the cheese batter, use a handheld electric mixer to beat together 1 pkg cream cheese, room temperature, 1 large egg, room temperature, lightly beaten, 1/4 cup powdered sugar, 1/2 teaspoon pure vanilla extract  
    • In another bowl whisk together 3/4 cup brown sugar, lightly packed with 2 large eggs until light and fluffy. Stir in 3/4 cup pumpkin puree, 2 tbsp. canola oil, and 1 tsp vanilla. 
    • In a separate bowl, sift together 1 1/4 cups all purpose flour, 1 1/4 tsp baking powder, 1/4 tsp baking soda, 1/4 tsp salt, 3/4 tsp cinnamon, 1/2 tsp nutmeg, 1/4 tsp ginger, and 1/8 tsp cloves.  
    • Gradually add the dry ingredients into the wet and mix together.
    • Divide the pumpkin batter between the 3 loaf pans, then pour the cheese batter on top. Bake until golden around the edges, about 35 to 40 minutes, or until a toothpick inserted inside comes out clean or with just a couple crumbs.
    • Cool 10 minutes in the pans, then remove from the pans and transfer to a wire rack to finish cooling.
     
    This recipe got good reviews and in my opinion is best served still warm out of the oven.
     
     Take advantage of pumpkin season and find ways to incorporate it into your favourite recipes.
    More to come!
     

    Monday, August 19, 2013

    Cinnamon Roll Cheesecake

    A week or so ago I came across the most incredible recipe - cinnamon roll cheesecake.
    I made it pretty soon after stumbling upon it on pinterest (where else?) and was not disappointed. I didn't make the cream cheese icing to go on top cause I found the cake decadent enough without it.
     
    It takes no more time than a regular cheesecake and it's insanely good. I recomend eating it while still kind of warm out of the oven.
     
    Recipe courtesy of easybaked.net


    Cinnamon Roll Batter
    • 2/3 cup sugar
    • ¼ cup butter, at room temperature
    • 1 egg
    • ½ cup milk
    • 1 tbsp vanilla extract
    • 2 cups flour
    • 2 tsp baking powder
    • 1/2 tsp salt
    Cheesecake filling
    • 2 pkg. (8 oz. each) cream cheese, at room temperature
    • 1 cup sugar
    • 1 tbsp vanilla extract
    • 2 tbsp flour
    • 3 eggs
    Cinnamon Filling
    • 1/3 cup butter, melted
    • 1 cup brown sugar
    • 3 tbsp cinnamon
    Cream Cheese Frosting
    • 2 ounces cream cheese, at room temperature
    • 3 tbsp butter, at room temperature
    • 2 tsp vanilla
    • 1 cup powdered sugar
    • milk (if needed to thin frosting)
    DIRECTIONS:
    • Preheat oven to 350 degrees F.
    • Grease a 9-inch Springform pan.
    Cinnamon Roll Batter
    • Using a mixer, cream together the butter and sugar.
    • Add egg, milk, and vanilla. Beat for about one minute, scraping down bowl.
    • Add flour, baking powder, and salt to the creamed ingredients. Mix on low speed until throughly combined.
    Cheesecake Filling
    • In a separate bowl, use a mixer to beat cream cheese and sugar for about 2 minutes on medium-high speed.
    • Add the eggs one at a time, beating together scraping down the bowl after each addition.
    • Add the vanilla and flour and beat for another minute.
    Cinnamon Filling
    • In a small bowl, combine the melted butter, cinnamon, and brown sugar. Mix until thoroughly combined.
    You have three individual parts to this cheesecake now. The batter, the cheesecake and the filling.
    Here is how to put them together:

    • Spread half of the batter onto the bottom of the Springform pan. It will be sticky and thick so spray your hands with baking spray and press down. It will be a thin layer, but trust me it will rise up during baking.
    • Pour all of the cheesecake batter on top of the cinnamon roll batter that is in the prepared pan.
    • Drop spoonfuls of the cinnamon filling over the entire top of the cheesecake.
    • Take the rest of the base batter and drop spoonfuls over the entire top of cheesecake. Once finished, take a knife to swirl the ingredients together. I say swirl, but its really just a big yummy chunky mess– just kind of gently mix all the toppings together without digging into the bottom crust.

    I'm working almost every night this week (regular sleep on Wednesday! Heyyyyy) so expect a lot of posts this week!