Showing posts with label Good Things. Show all posts

Saturday, March 28, 2015

Healthy Homemade Granola Bites

For book club I really wanted to make something. I also wanted to make some healthy and filling snacks that I could easily shove in my mouth while entertaining a 3 month old.
I googled granola bar recipes and came across a tasty-sounding one from Oh She Glows.
(You can find the original recipe here)
I changed it up a bit as I didn't want any nuts and didn't have any seeds. 

So here's how to make my Oh She Glows inspired granola bites


  • Start by dehydrating some fruit. I used strawberries and pineapple because I had them on hand and like the way they taste dehydrated. Thinly slice your fruit and put them on parchment paper, or tinfoil, or a silicone mat and bake in your oven at the lowest setting (mine was at 170 degrees) for about hours.
  • On another baking sheet, toast 2 cups rolled oats in the oven at 350 for about 10 mins.
  • In a bowl, mash 3 bananas (heat them in the microwave first for about 30 seconds for easier mashing) together with 1 tsp vanilla extract. 
  • Stir in the toasted oats and chopped dried fruit (plus whatever else you want to add - nuts, seeds, etc) plus 1 tsp cinnamon.
  • Spoon mixture into a pan lined with parchment paper and press down to make the surface as even as possible. Bake at 350 degrees for about 25 mins until firm and slightly golden along the edges. 
  • Let cool for 10 mins then remove from pan. Allow bars to cool for at least another 10 mins in the freezer (or longer in the fridge) before cutting into bites or bars.

(Based on the recipe above, sans nuts and seeds, and cut into 25 bites, each bite is about 42 calories)   

The bites are tasty but if you like them a bit sweeter brush the bites with a bit of maple syrup.


Saturday, March 1, 2014

The Happy List Redux: The 100 Happy Days Challenge

I didn't do a Happy List for February because I want to put a different spin on it for a little while.


For 100 days to be exact.
Inspired by friends & family on Instagram, I'm going to start the 100 Happy Days challenge.
I can guarantee that I won't be happy all day for 100 days but if this helps me find things to be happy about on those days when things don't feel like they're going my way then the challenge will have worked.

Want to join in?


Go to the 100 Happy Days website for the official instructions (it's not overly complicated, basically just don't use this challenge to make people jealous of your fabulous life).
Then upload your pictures to Instagram or twitter or Facebook using the #100happydays hashtag.
Or do what I plan to do: a weekly round-up of the things that have made me happy each day of the week. 
Fridays will be my round-up day and I'll post my happy things here.
Feel free to send me your happy things for inspiration or if you just want to share them.

100 Happy Days starts now!

Monday, February 3, 2014

Happy Birthday Mom!


To my mom -

 who taught me to be strong and passionate, kind and accepting of everyone.
who gave up a lot so her family could have a bit more.
who would wake up early on weekends to take her daughters to gymnastics practices and competitions.
who once walked through a snowstorm to bring my sister Tylenol. 

Who I love very much.

Happy Birthday!

On Saturday, with the invaluable help of my aunt Wendy, my dad, sister and I successfully threw her a surprise party!
I can't thank everyone enough for braving the bad weather and making it out (and completely understand those who chose not to risk the drive - I don't think I would have risked it either) .

She was completely shocked and (hopefully) happy to see so many familiar faces there to celebrate with her.

Although I forgot to take more, here are a few pictures from the party!


The theme of the party was Paris so we colour coordinated things white, black & pink.
On the carrot cake I stencilled happy birthday with icing sugar. Unfortunately the sugar dissolved and didn't show up as well so I tried to re-do it with sprinkles, which also didn't really work.
Using an image I found online, I traced over the eiffel tower on parchment paper with melting chocolate and let them harden before using them to decorate the edges of the cake (to hide the less-than-stellar icing job).


Our spread was pretty full with lots of kind party goers bringing snacks to add.


And everyone left with a party favour - delicious looking macaron soaps courtesy of Baked Soap.


A few people thanked me for alerting them it was soap as they would have eaten them on the way home.
I ordered these soaps here (more info available on the website here) and they make amazing party favours for any occasion.

Happy Birthday Mom!
I love you.


Monday, December 9, 2013

Christmas Market & Mulled Wine

On Friday night John and I made our way down to the Distillery District to meet up with some friends to check out the popular Christmas Market. 
Having never gone before, my expectations were high from seeing pictures in years past. I was not disappointed.


When you get to the Distillery District the first thing you see is lights, lights, and more lights.
It's magical.
Unless you go during the day, then I can't promise the lights will be as magical. 


It's just beautiful. I spent the first few minutes just squealing.
We stopped first for some free scotch (John) and apple cider & rum (me, because they had temporarily run out of mulled wine) and warmed up by the fires they had going in their beer market (see the first picture).
Then we walked around to check out the tree, the carousel, and the ferris wheel. 


On our way to the wine sampling (where there's wine, we'll find it) we stopped to pose with the Gingerbread house. Then we sampled a selection of Ontario wines from Malivoire, Henry of Pelham, and a few others we've yet to visit.  


Then after a quick stop for a grilled cheese with bacon sandwich, we made our way back to the adult beverages for some mulled wine and more scotch.


My first time trying mulled wine was Friday afternoon when I made my own. 
I'm hooked. 
I used Martha Stewart's recipe and made a few changes based on what I had handy.


Follow the original Martha recipe here 
Or my slightly different version below
  1. Set a pot over high heat. Pour in one bottle of red wine.
  2. Add in the zest  and juice from 1 orange, 1 tbsp black peppercorns, 1 tbsp cloves, 1 cinnamon stick, and 1/2 cup brandy.
  3. In a tea bag, spoon in 1/2 tbsp nutmeg and 1/2 tbsp all spice. Bring up to a boil and add teabag to the mix. Reduce heat to low and let simmer for about 30 minutes. Turn off heat and let wine cool slightly.
  4. Pour wine through a strainer to remove the zest, peppercorns, cloves, cinnamon, and teabag.


Then pour contents back into the original wine bottle.
Mulled wine is best served warm so if you don't drink it right away heat it up again before serving.
And if you're feeling crafty - make a fancy new label for your bottle.
I made this one for the bottle I brought to my brother in law's birthday dinner last night.


Most of the alcohol burns off during the process so if you want you can add a dash of brandy to the finished process for more of a kick.
If not, just enjoy the wonderful taste of Christmas Sangria! 

Wednesday, September 18, 2013

Easy & Low Calorie Banana Pancakes

If you're anything like me, you've come home from work and made pancakes.
Or been watching tv and decided, hey, I'm going to make some pancakes.
Or looked in your fridge/cupboard and found items that make you say, "these would go great in some pancakes."
 
Basically I love pancakes.
They're so versatile. They're a delicious medium for most other types of food: add fruit or berries, add bacon, add candy, even add cheese.
 
The only problem is that the amount of wheat and sugar isn't so great for you.
 
I saw a recipe on Pinterest awhile back which suggested that banana pancakes could be made using only 2 ingredients.
 
I was skeptical.
But last weekend I finally got around to trying it out and the results were delicious.


It's really, really simple to make these.
 
You'll need:


(the pinterest recipe called for a 1 banana: 1 egg ratio but I was successful with the extra banana).
So that's 2 bananas and 1 egg.
Then:

 
Pre-heat a frying pan and if it's not non-stick then make sure it's sprayed or buttered.
Pour the banana mix in and let it cook until it can be flipped, just like a regular pancake.
 
The banana tastes so good when it starts to caramelize from the heat. You almost don't even need to add any syrup.
 
And the bonus is that at a total of only 285 calories for the entire batch of pancakes (mind you I got about 3-4 pancakes out of my mix), you're also getting a lot of protein from the egg and potassium from the banana.
 
Plus with the calories you save you can eat an entire pack of bacon to balance things out.
 
...right?

Saturday, July 6, 2013

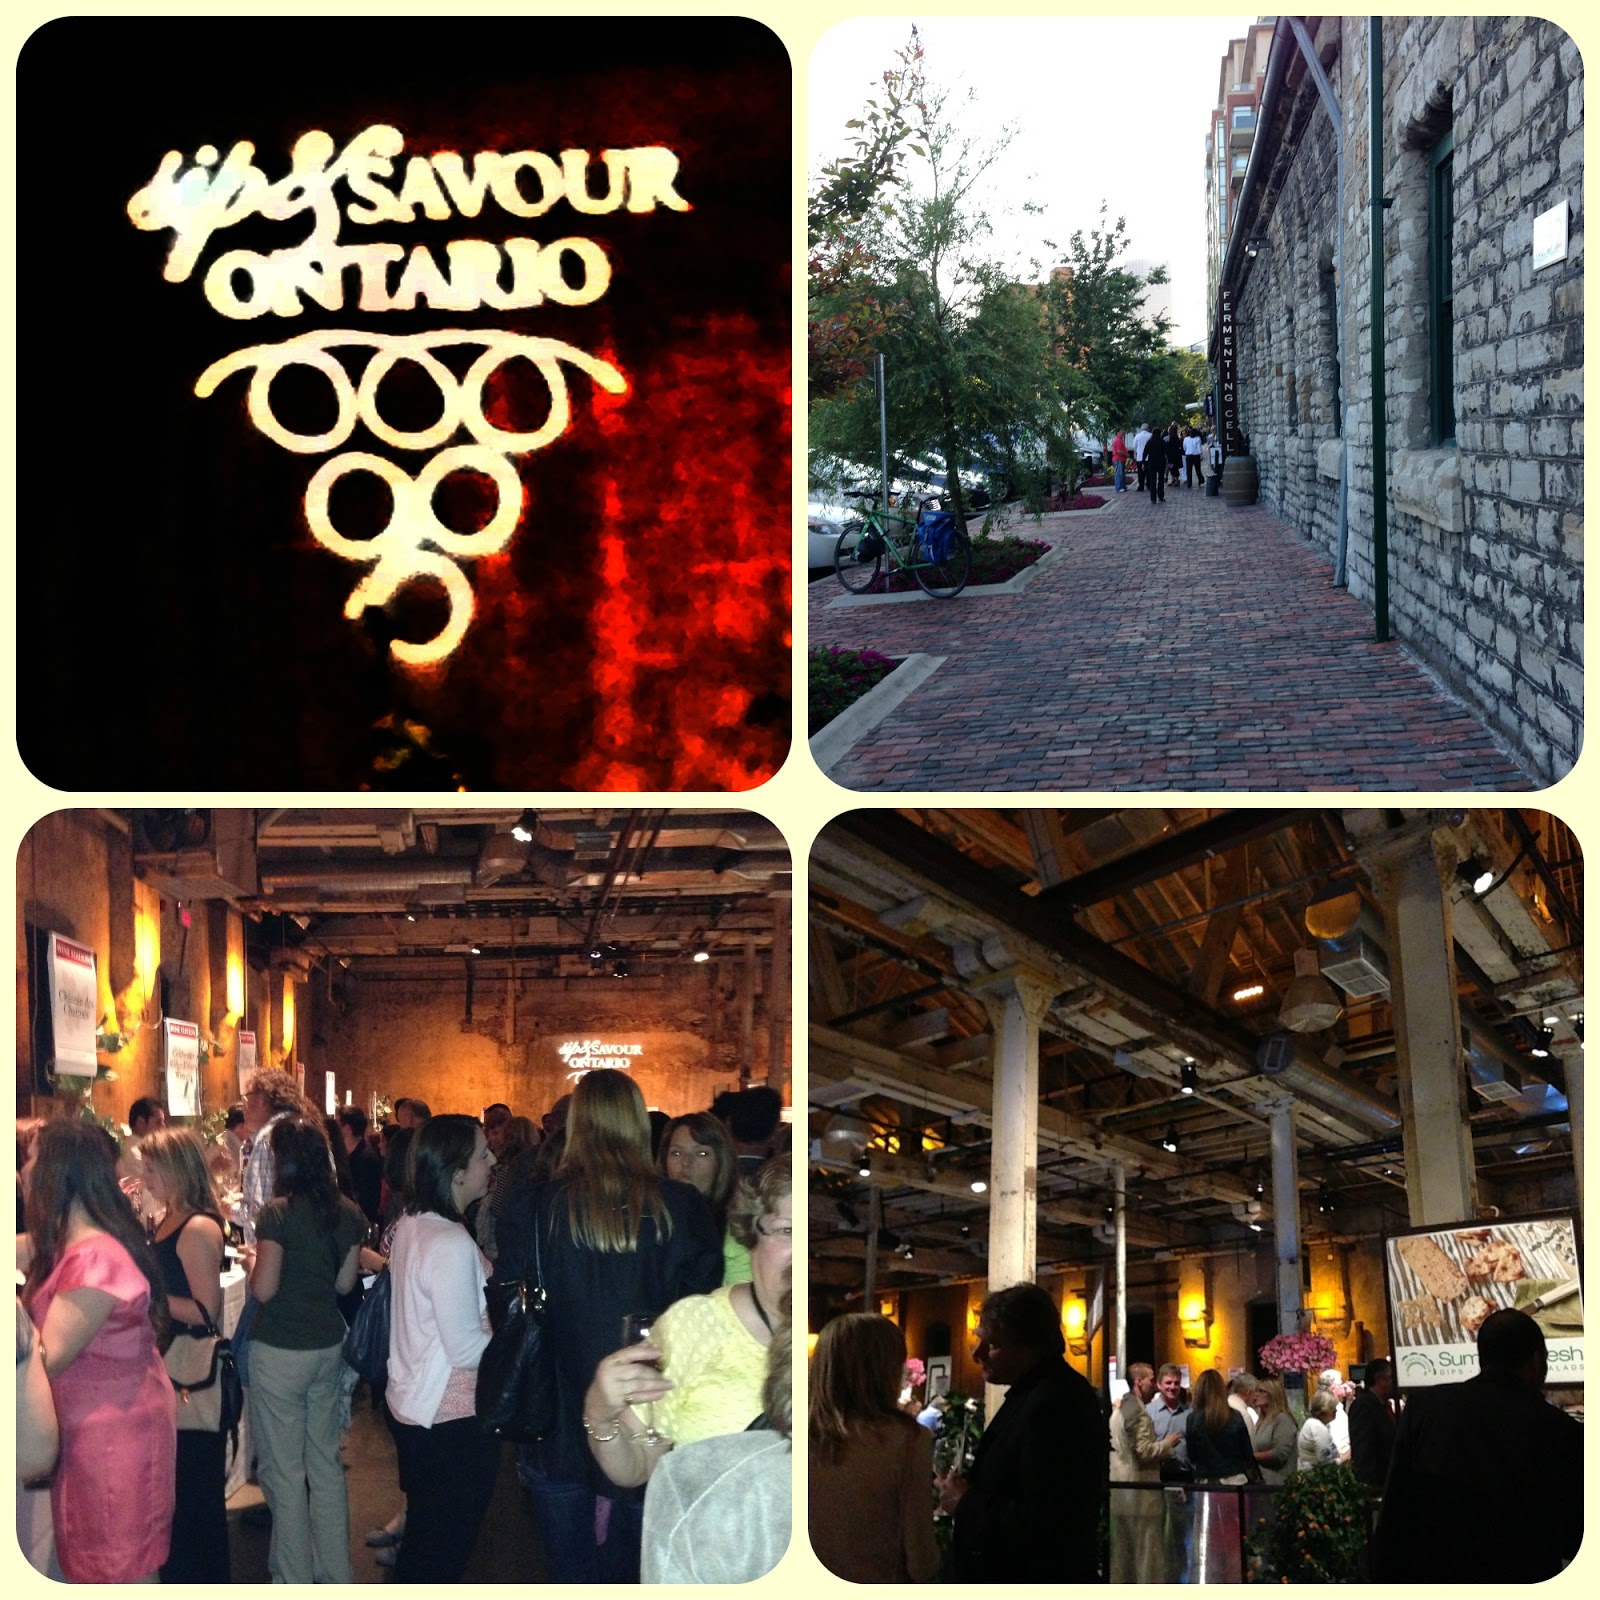
Sip & Savour Ontario

Back (way way back) in June, John and I went to the Sip & Savour event in the Distillery district.
Having never attended this event before, I was unsure what to expect but was very excited at the prospect of eating amazing foods and sampling tons of wines.
 
And sample wines we did!
Here's a list of the participating wineries - HERE - and I can proudly (?) say that we almost sampled wine from every single one.
Almost.
I think my last glass was around Kacaba... I tried another white after a stop at that booth and then promptly shattered my wine glass.
 
And then cut myself off.
 
 
The Distillery District in Toronto is absolutely beautiful to walk through and there's usually an event of some kind going on most weekends.
Here's the calendar of events for the rest of this month.
 
Cheese was featured quite prominently (much to my liking) and we sauntered in to a presentation on cooking with cheese - wisely suggested to use by the food guru herself, Ginger Rose.
 
I don't have the information that they gave us with me so I can't tell you what types of cheese we sampled.
I can tell you they were delicious and the servers also topped up our glasses with pairing wines.

 
The food was delicious.
My hands down favourite was the duck confit crepes, shown below.

 
There was a good deal of seafood up for sampling too which John dug into.
He was fortunate enough to grab the last of the halibut sandwiches.

 
We also grabbed plates which were promptly filled with freshly baked bread, cheeses including cheddar and a feta & watermelon salad, then spicy peppers, pickled beans, and jams like cherry chocolate and plum.
I went back for a second plate of this.

 
I forgot to take a picture (truth: I did take a picture but the picture is of the deserts I had put in my purse to take home) of the amazing mouses that were offered. They had raspberry and triple chocolate among a few others.
 
Also very tasty were the choux pastries from Popelin.
They had blueberry, lemon, and ice wine flavours. All 3 were to die for but the lemon might have been my favourite.
This was also where I broke my wine glass, trying to set it on a non-ledge so I could fill my grubby little hands with pastries.

 
Me, esentially:
 
 
All in all, it was a fantastic night that I would highly recommend checking out. Tickets run a bit on the pricey side but you certainly fill your tummy with wonderful foods and it's an opportunity to get drunk in the classiest of fashions.
 
 Plus the Distillery District is just beautiful.


Wednesday, June 19, 2013

Cinnamon Buns like you've never had them before

While browsing through the copious amounts of delicious recipes on Pinterest one night, I came across this one recipe that sounded too good to be true.
It also combines two of John's favourite things so I knew I would have to try out this recipe at some point, and probably sooner rather than later.
So last week I did it.
And it did not disappoint!
 
I tried to post this last week but my computer kept refusing to save my drafts so eventually I just got angry and stopped trying.
 
But here it is, in all of it's glory.


Ingredients

  • 1 box Rainbow Chip Cake Mix (powder mix only)
  • 2 pkg. active dry yeast
  • 2 1/2 cups warm water
  • 1 tsp. salt
  • 1 tsp. vanilla
  • 5 cups bread flour
 
FILLING
  • 1/2 cup butter softened
  • 1 cup brown sugar packed
  • 1 cup yellow cake mix
  • cinnamon
  • sprinkles
FROSTING
  • 1/4 cup butter softened
  • 3 cups powdered sugar
  • 1/2 cup yellow cake mix
  • 1 tsp. vanilla
  • 3-6 Tbsp. milk
  • sprinkles

Instructions

  1. In a large liquid measuring cup, measure out 2 1/2 cups warm water. Almost to hot to touch but not scorching. Pour in the 2 packets of active dry yeast and let it activate and foam up. (you could just pour the measured water into a bowl as well, I just find this easiest)
  2. Once yeast is active pour into bowl of a stand mixer. Add rainbow chip cake mix, salt, vanilla and bread flour. Use dough hook attachment to knead dough together, just for a minute or two.
  3. Spray a large bowl with cooking spray and place dough inside. Cover with saran wrap. Let sit for an hour until doubled in size. Punch dough down with fists and cover again and let rise for an additional hour until double in size.

 
4. Once dough has gone through its second rise, remove and placed on a clean floured surface. Roll out into a large rectangle shape.

 
5. Smear softened butter over top. Next evenly sprinkle, distribute and rub brown sugar over top. Then sprinkle yellow cake mix evenly over top of that. Rub gently to evenly cover if needed. Next sprinkle with desired about of cinnamon and sprinkles.


6. On one of the long sides, roll up to make a long and skinny log. Slice into even rolls. It should yield 24-29 rolls depending on how thick you slice them.
7. Place in a greased 9x13 baking pan, 12 rolls per pan.


8. Cover with plastic wrap and let cinnamon rolls rise a final time in the pan, about 30 minutes, or until they have doubled in size.

9. Bake at 350 for 15-20 minutes.
10. While cinnamon rolls are baking, make the cake batter frosting. In a large bowl, beat butter, powdered sugar, cake mix, vanilla and milk. Add more powdered sugar/milk until desired consistency is reached. Add in as many sprinkles as desired.

 
11. Spread frosting over warm rolls. Sprinkle with additional sprinkles if desired.

 
If you love deserts, if you love cake, if you love the texture of cinnamon buns, and if you love ooey-gooey icing, than you need to try this recipe.
 
And if you haven't already joined the Pinterest craze I highly recommend you do!
 

Wednesday, May 1, 2013

Time for a Change

 
When I was living with my parents - once we'd moved into our house and I had my own room - I used to redecorate and move furniture around at least once every 18 months or so.
I think it's healthy to change things around, clean out the clutter that's accumulated and start anew.
 
I've been living in my apartment now for 4 1/2 years and not once has anything really changed. Sure we got a new shelf here and there, we did buy a wardrobe because the closet became too small (I selfishly took it over) some new pictures to hang up, we cleaned out our closets and shelves a few times, but apart from that everything has been more or less untouched for almost 5 years.
 
I've been itching to change things around for a long long time. I've wanted to paint the place since we moved in but we've never gotten around to it.
 
I know John isn't such a huge fan of change (as indicated by the desire to not paint or really switch up furniture, also he said as much yesterday) but I figured it was time to stop talking about it and hoping he'd get on board and just go for it.
 
I moved a bookshelf out of our bedroom and into the living area where it actually works quite nicely.
That gave us some extra space in our oh-so-cluttered bedroom. I uncramped a corner and pulled the bed out into the centre of the room so that John has room on his side of the bed to open his wardrobe, walk, etc.
 
Then I went to ikea.
 
I'd been eyeing a few items for awhile and I finally put my mastercard to work.
 
Here's what I bought:
 
 A Hemnes bedframe in black-brown.
 
 
2 new matching Hemnes sidetables, also in black-brown.
 
 
Next on the list is the 8 drawer Hemnes chest, seen below.
Also a flat screen TV for the bedroom so we can get rid of the state of the art TV with built in VCR that currently occupies space on our dressers.

 
I started to assemble the side tables as soon as I got home so tomorrow will be spent finishing them and starting on the bedframe!
Then out for some Korean food with a friend.
 
Hurray for change!


Monday, April 29, 2013

A Twist on Banana Bread: Cake Balls

 Having gotten back into the kitchen and making more dinners and also starting to bake again, I couldn't help but try something new with banana bread.
It's a staple recipe - when you have bananas that start to get a little too brown my fail safe is a loaf (or two) of banana bread. I've tried different variations to keep it fresh. I made one with an oreo cookie crumb bottom, with sliced bananas layered inside the bread, with eggies, with caramel chocolate chips, etc.
This time, having had some success with my red velvet cake pops, I decided I would turn my banana bread into cake balls!
 
 
  • Preheat oven to 350 degress.
  • Beat 1/4 cup butter with 3/4 cup sugar. Add in 1 egg and mix until combined.
  • Mix in 2 medium bananas, 1 tbsp vanilla, 1/4 cup milk, and mix until smooth.
  • Add in 1 1/4 cup flour, 1 tsp baking soda, and 1 tsp salt and mix until combined.
  • Bake for about 45 mins to 1 hour or until a tester inserted into the cake comes out clean. For cake balls/pops I find it's better to use a cake that is still a bit soft so err on the side of 45 mins rather than an hour.
  • Let the banana bread cool completely then crumble into peices. If your bread is crustier (like mine was) pop it into a blender and pulvarize it down into breadcrumbs.
  • Mix with 1/2 cup Philadelphia chocolate spread. Form into balls and put in the fridge for at least 30 mins.
  • Melt 1 bag of chocolate melts then dip each ball into the chocolate, letting the excess drip off. Allow the chocolate shell to harden
  •  
    I decorated mine with banana candies as well as with dried banana chips.
    Enjoy!

    Sunday, December 23, 2012

    2 Days Til Christmas: Gift Ideas for Any Occasion

     
    My good (and multi-talented) friend Danielle over at the Sweet & Splendid Bakeshop has a new hobby: soap making.
     
    She seems to have found a perfect way to expand her desert empire.
     
    When I saw these soaps for the first time my initial reaction was to want to lick them.
    Not only do they look exactly like the real thing, but they smell pretty darn delectable as well.
     
    Wanting to share these incredible soaps, I purchased a nice variety of them.
     
     
    Currently, they are packaged up in Martha Stewart Cupcake gift boxes that I bought from Winners, ready to be given to their intended giftees (who shall all remain nameless for the time being).
     
    Check out her Bakeshop here
    And check out her incredible soap shop on Etsy here
     
    *The Strawberry Shortcake soap and the Sweethearts Valentine soaps are brand spanking new and I want like 25 of them.