Showing posts with label Knitting. Show all posts

Sunday, February 23, 2014

Adventures In Knitting : The Cable Stitch

My mother in law made us this incredibly beautiful and intricate Aran wool sweater for our pup for Christmas.
Woven into it were cable stitches and I decided that I wanted the cable stitch to be my next knitting adventure.

Turns out it's not as hard as I thought.
For a first try my cable wasn't too bad but I'll work at making it tighter and making it pop more.


I knit it into a baby blanket that I made for my good friends who are pregnant with their first child, due this summer.
They're not as impatient as me so they're planning to wait to find out if they're having a boy or a girl until the baby arrives.

Not that I want to be accused of gender typing, but I decided that grey and white was a good way to go.
It also matches with most colours so should be fine with whatever room they decide to paint the baby's room. 


If you want to learn to cable stitch, I recommend this youtube video, which was the one I watched and seemed pretty straight forward. Although I did practice a few times before I started incorporating it into the blanket.


And if you don't like that one, search around a bit because there are a ton of great video tutorials online.

I made up my own pattern which went somewhat like:

row 1: knit 25, purl 14, knit 25, purl 14, knit 25
row 2: p 25, k 14, p 25, k 25
row 3: k 25, p 2, put 5 on cable, knit 5,  knit 5 off cable, p 2, k 25, p 2, put 5 on cable, knit 5, knit 5 off cable, p 2, knit 25
row 4: p 25, k 14, p 25, k 14, p 25
row 5: k 25, p 14, k 25, p 14, k 25
row 6: p 25, k 14, p 25, k 14, p 25
row 7: k 25, p 14, k 25, p 14, k 25
row 8: p 25, k 14, p 25, k 14, p 25
row 9: k 25, p 2, put 5 on cable, knit 5,  knit 5 off cable, p 2, k 25, p 2, put 5 on cable, knit 5, knit 5 off cable, p 2, knit 25

then repeat rows 2-9 until you reach your desired length.


I don't know what I want to try learning next in my knitting adventures... 
suggestions?

Thursday, January 23, 2014

Adventures in Knitting: How to Knit a Beard


This year, much like last year, I won't be celebrating Valentine's Day with John.
Last year we were in a jeep on the Serengeti, chasing down lions and leopards and zebras (oh my).
And that was exciting enough.
This year John is off to climb Mt Washington so my valentine will be my mom because I secured her once I found out I'd need one and she gives awesome presents.
I'm anticipating quite a bit of chocolate.

But back to the point of the post.
I knit John a hat for his cold adventure as his valentine present.
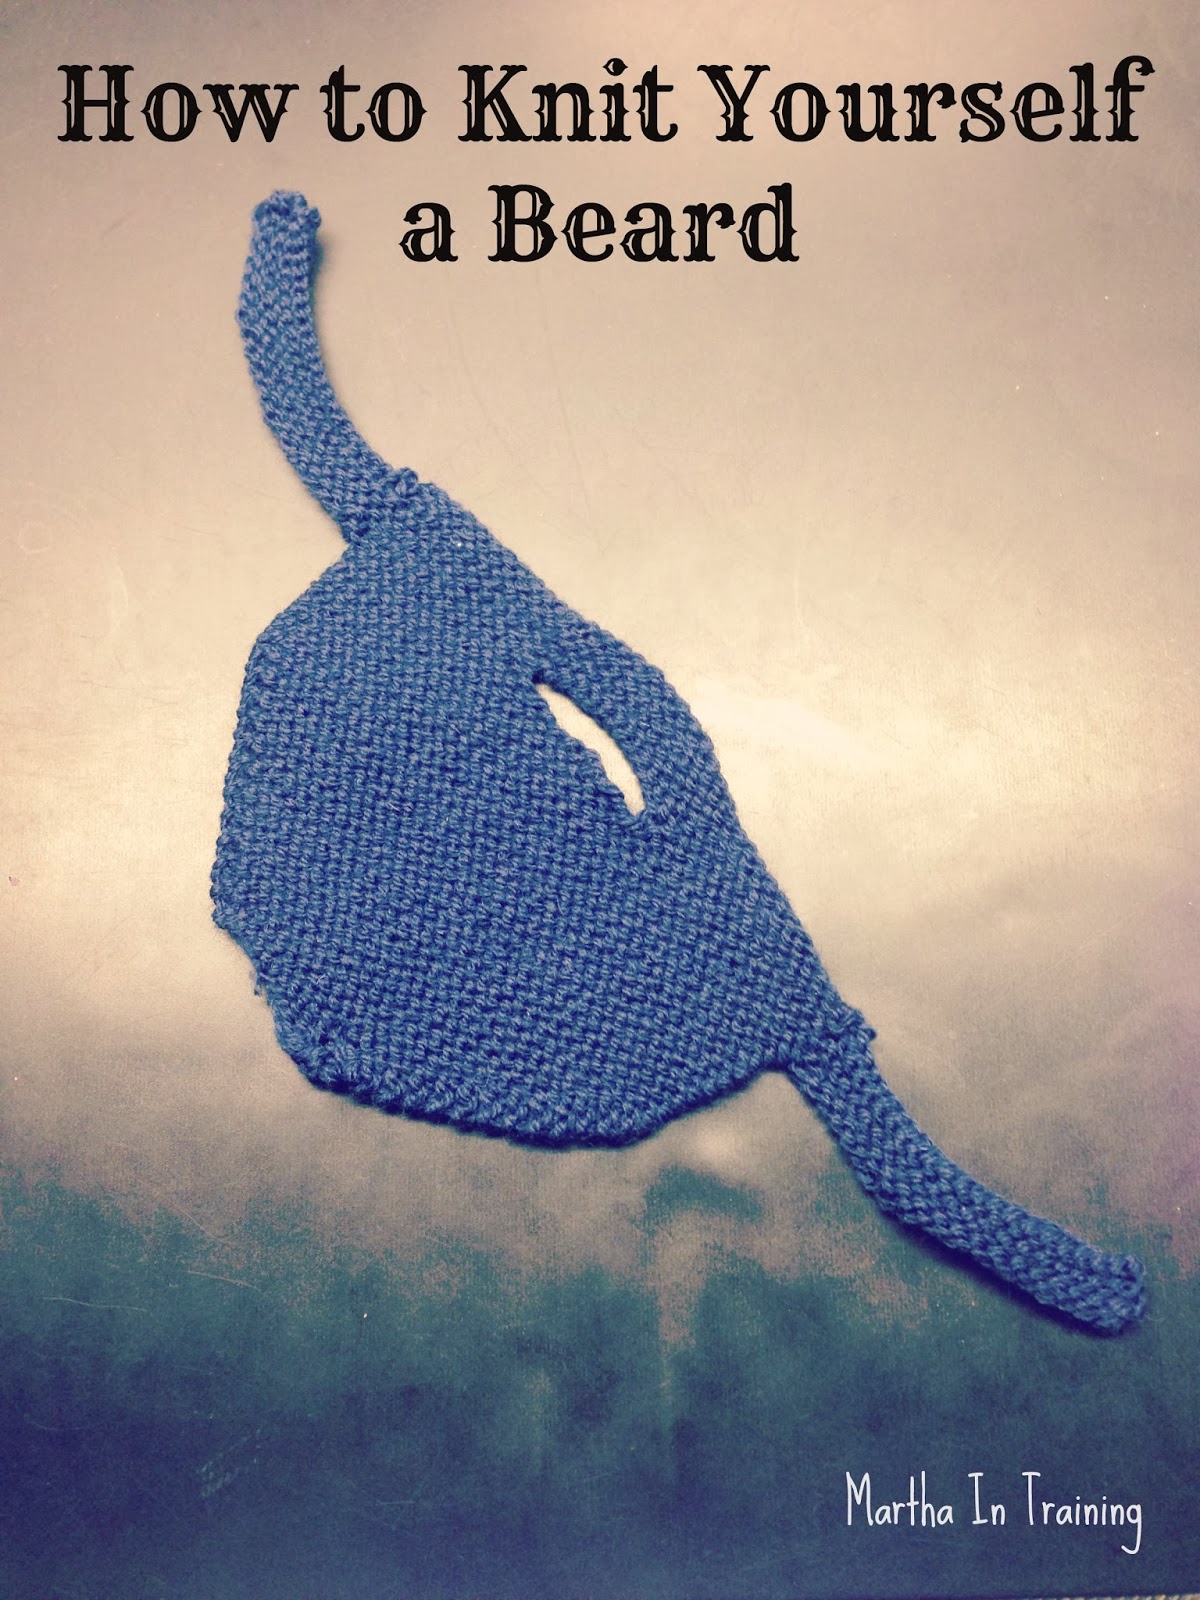
I also thought it would be funny to knit him a face warmer to go with it.
So, inspired by a hat I saw one year at the family Country Christmas gift exchange, I did.

And you can too! 


Using 4 mm needles and your choice of material, cast on 36 stitches.
Knit 4 rows.
On row 5 knit 13 stitches, cast off 10, then knit the remaining 13 stitches.
(To make the mouth a bit wider I'd be tempted to add in a row here where you knit 12, cast off 2, then knit the remaining 12. I may try this next time)
Row 6 work back 13 stitches, cast on 10 stitches, then finish the row.
Continue knitting until the beard reaches the bottom of your chin.
Knit 2 together at the end of every row until you're left with 14 stitches.
Cast off.

Separately, knit two strands to connect the beard to a hat. Otherwise purchase some elastic thread and connect it to the beard so that it can be hooked around your ears.
How? I don't know. I haven't found elastic thread yet.


There's still one more surprise to the hat - John if you're reading this, stop now.

...


I put on a patch that we bought in Tanzania of Mt Kilimanjaro and another patch that I ordered online of Mt Washington. 
The patches commemorate his summits AND hide the ugly back part of the hat so... 

win-win.


Sunday, January 12, 2014

Knitting Adventures: My First Hat

Having had moderate success moving away from my straight patterns (scarves and blankets) to more challenging patterns (the knittens from a previous post), I tried my hand at making a hat.
I started on circular needles but quickly came to hate them. I may need to give them a second chance in the future though.
I switched the my regular boring straight needles and picked a smaller size to ensure a warmer, more tightly knit hat. I used 4.0 mm (US 6) needles. 

I started with the basic pattern idea - knit a swatch to know how stitches it's going to take to make it around your head. Always err on the side of caution and knit less than you think if you're unsure. It's better if the hat needs to stretch a bit anyway.
I forget how many stitches it took me but it was quite a few. 

Then I knit and knit and knit until I had about 6 inches of the hat. Then I started knitting 3 together at each end to start tapering the hat down. 
Once I was down to about 10 stitches left I casted off and stitched the back together. 
I won't show you a picture of the back because it's horrible.
Nowhere near as nice as the front. 


I may do a few fixes to try and correct the monstrosity at the back. All I need is a patch I ordered online to arrive then voila - this hat will be a Valentines day present for my mountain climber.


I'll show you the final product once it's done! 

Wednesday, January 1, 2014

Adventures in Knitting: Knittens (to warm hands on cold days)

During my experimentation with knitting patterns more complicated than blankets and scarves, I moved on to mittens. 
My first attempt ended in a gigantic mitten better suited for an oven mitt. 
So I started again, with a better idea of how to proceed.
The end result was still a bit bigger than I perhaps would have liked but I used it to my advantage and created felt inserts filled with rice that can be microwaved to provide some extra heat. 

Follow the pattern from Martha Stewart that I posted in an earlier post (also found here) or do what I did and use thicker wool and thicker needles and just cast on half the number of stitches they call for and continue with halving the numbers (except for number of rows, then just go by how wide the mitten looks).

I've taken to calling this knit mittens 'knittens'.


Once your knitten has been cast off, use a darning needles to stitch the mitten together around the edges.
I used a white wool to show what I did, but I removed it after and re-stitched it with the same colour wool to make it look cleaner.


For the microwavable insert, I traced the finished knitten onto a red felt stocking I bought from the dollar store. I ended up having to cut it a little smaller to fit into the mitten. I sewed around the edges, leaving a small opening into which I poured uncooked rice. Add just enough to fill the mitten without leaving it bulging. 


Ideally, use thread the same colour as the felt. Unfortunately in my case my dog took off with the red thread in her mouth and it was too slobbery to use on something I hoped would turn out nice.


I thought about sewing the inserts into the knittens but ultimately figured leaving them as inserts was the better option because they did make the knittens quite bulky.

I gave these knittens to my father-in-law, who works outside and I'm sure with all the crazy weather lately could use something to keep his hands warm. 

They make a cute gift AND I was able to knit both mittens in less than 5 hours so this is a project that won't take a long time to finish.

Here's to a 2014 filled with many more handmade crafts!
(Hopes & Dreams item #9!)