Showing posts with label Appetizers. Show all posts

Saturday, July 6, 2013

Sip & Savour Ontario

Back (way way back) in June, John and I went to the Sip & Savour event in the Distillery district.
Having never attended this event before, I was unsure what to expect but was very excited at the prospect of eating amazing foods and sampling tons of wines.
 
And sample wines we did!
Here's a list of the participating wineries - HERE - and I can proudly (?) say that we almost sampled wine from every single one.
Almost.
I think my last glass was around Kacaba... I tried another white after a stop at that booth and then promptly shattered my wine glass.
 
And then cut myself off.
 
 
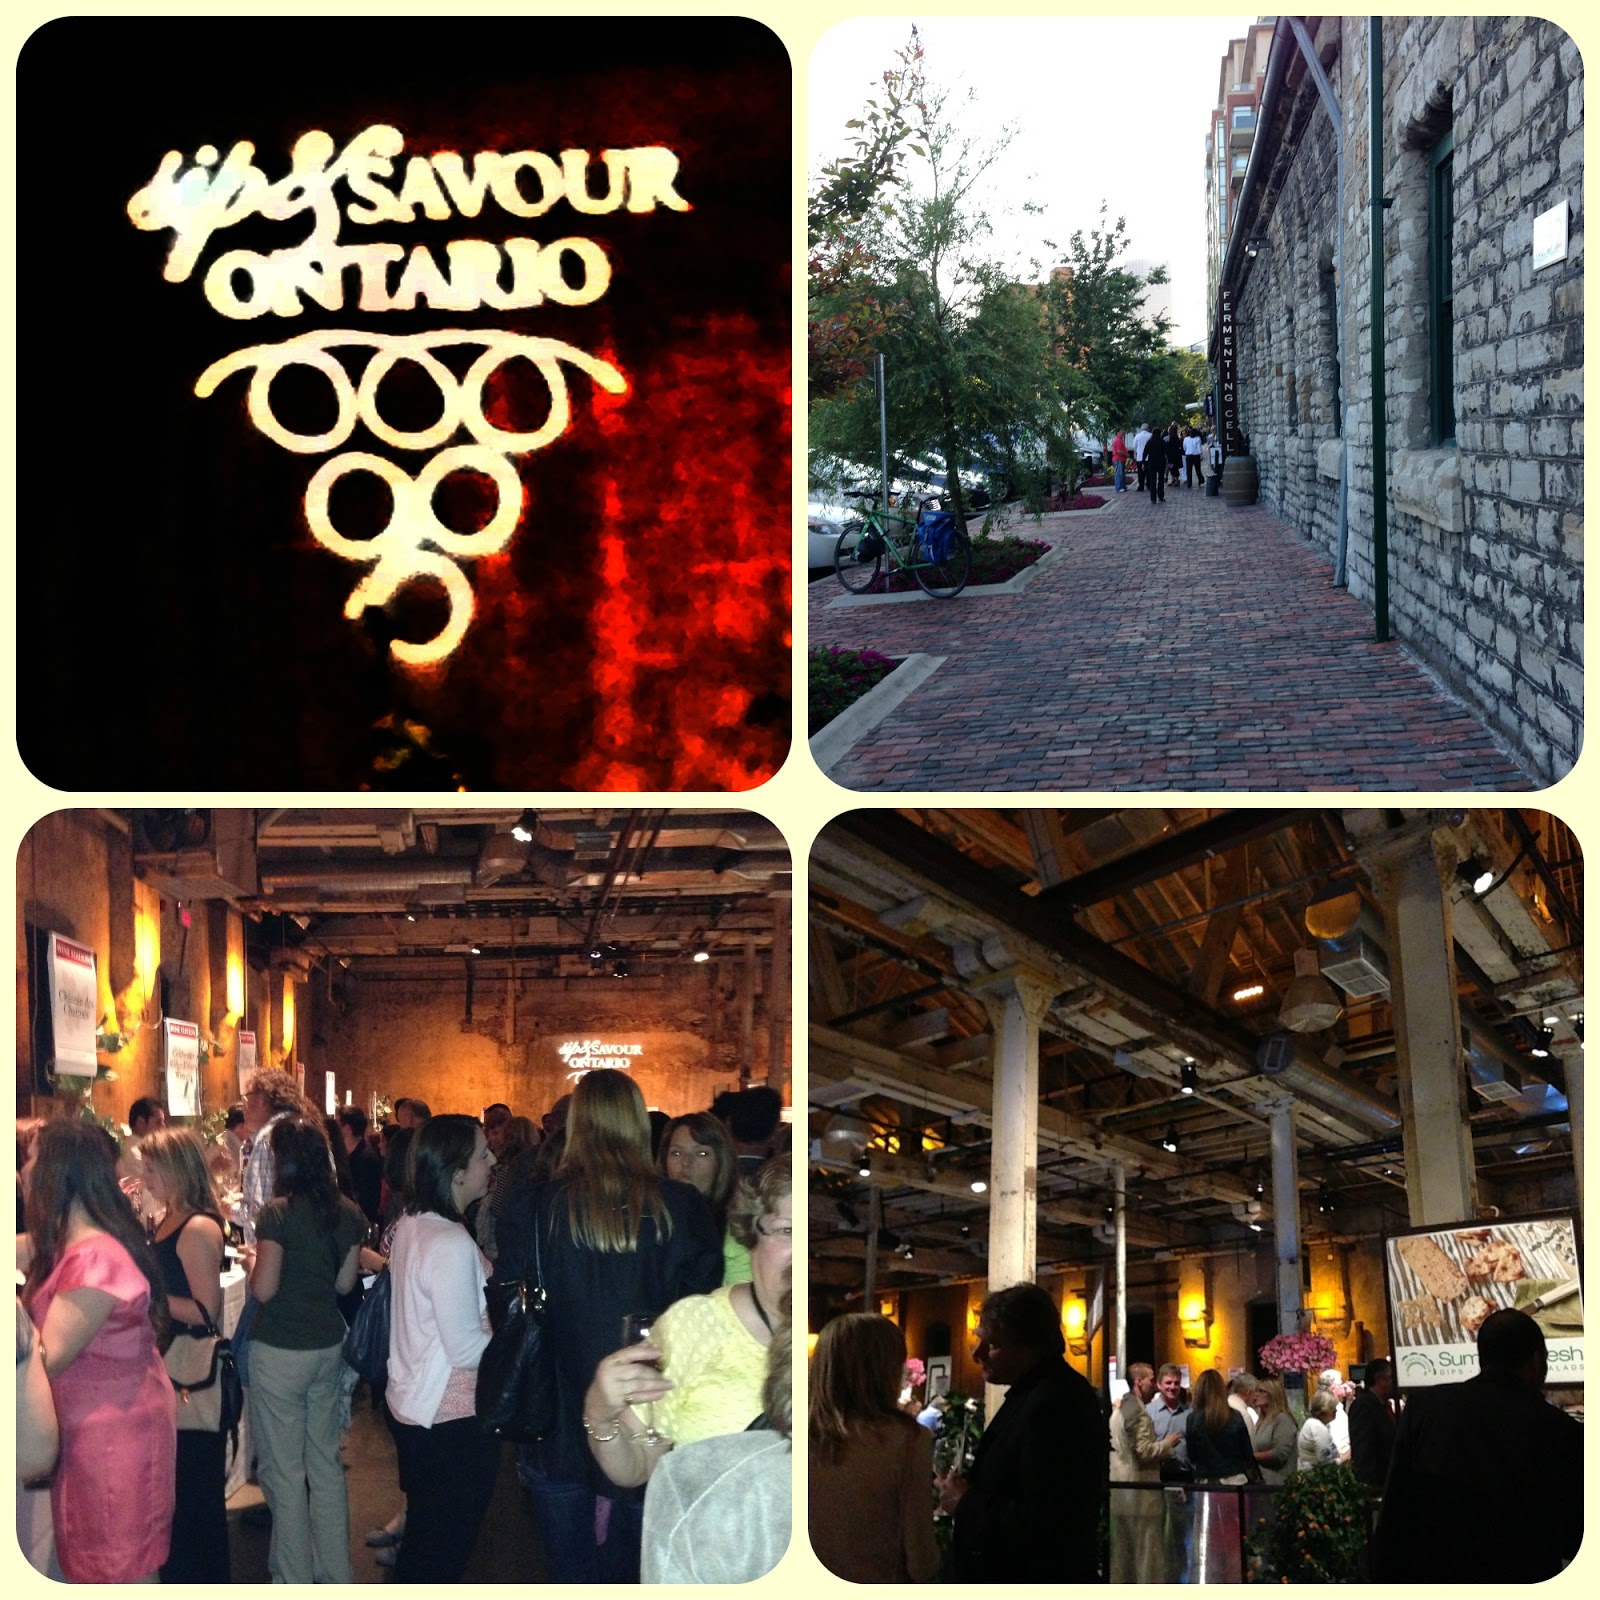
The Distillery District in Toronto is absolutely beautiful to walk through and there's usually an event of some kind going on most weekends.
Here's the calendar of events for the rest of this month.
 
Cheese was featured quite prominently (much to my liking) and we sauntered in to a presentation on cooking with cheese - wisely suggested to use by the food guru herself, Ginger Rose.
 
I don't have the information that they gave us with me so I can't tell you what types of cheese we sampled.
I can tell you they were delicious and the servers also topped up our glasses with pairing wines.

 
The food was delicious.
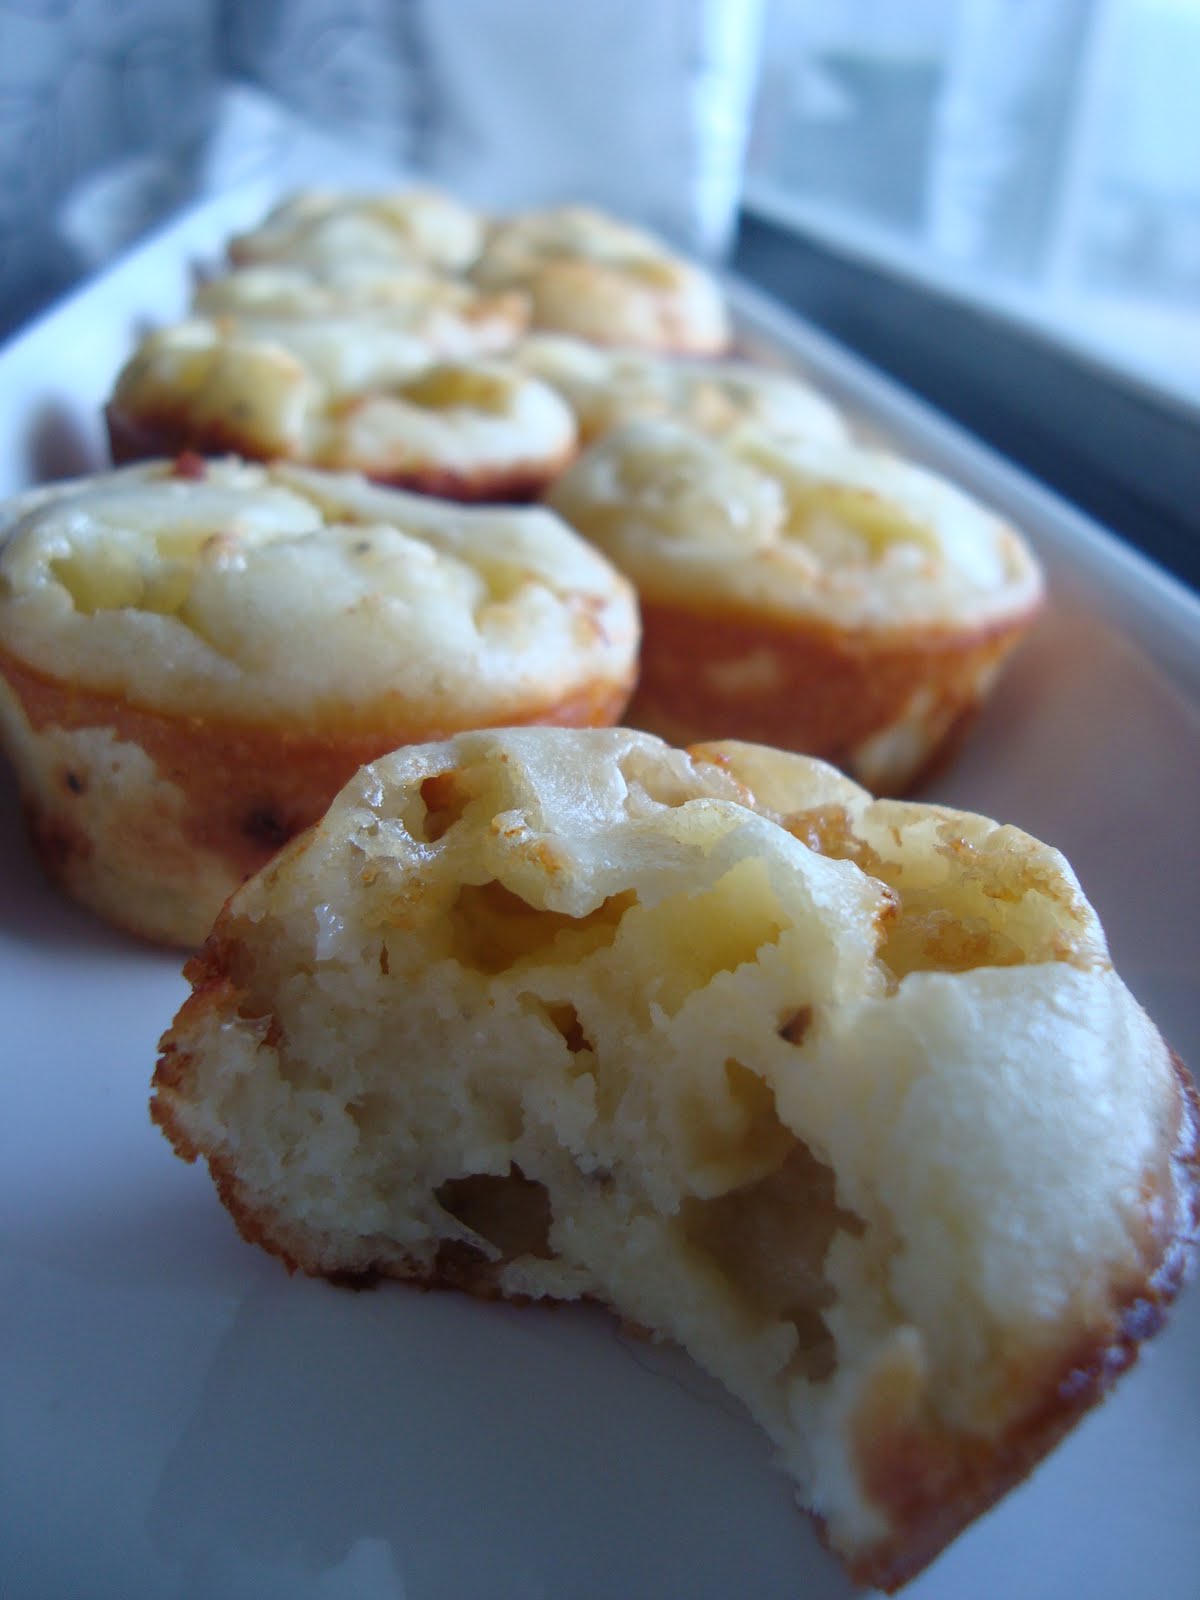
My hands down favourite was the duck confit crepes, shown below.

 
There was a good deal of seafood up for sampling too which John dug into.
He was fortunate enough to grab the last of the halibut sandwiches.

 
We also grabbed plates which were promptly filled with freshly baked bread, cheeses including cheddar and a feta & watermelon salad, then spicy peppers, pickled beans, and jams like cherry chocolate and plum.
I went back for a second plate of this.

 
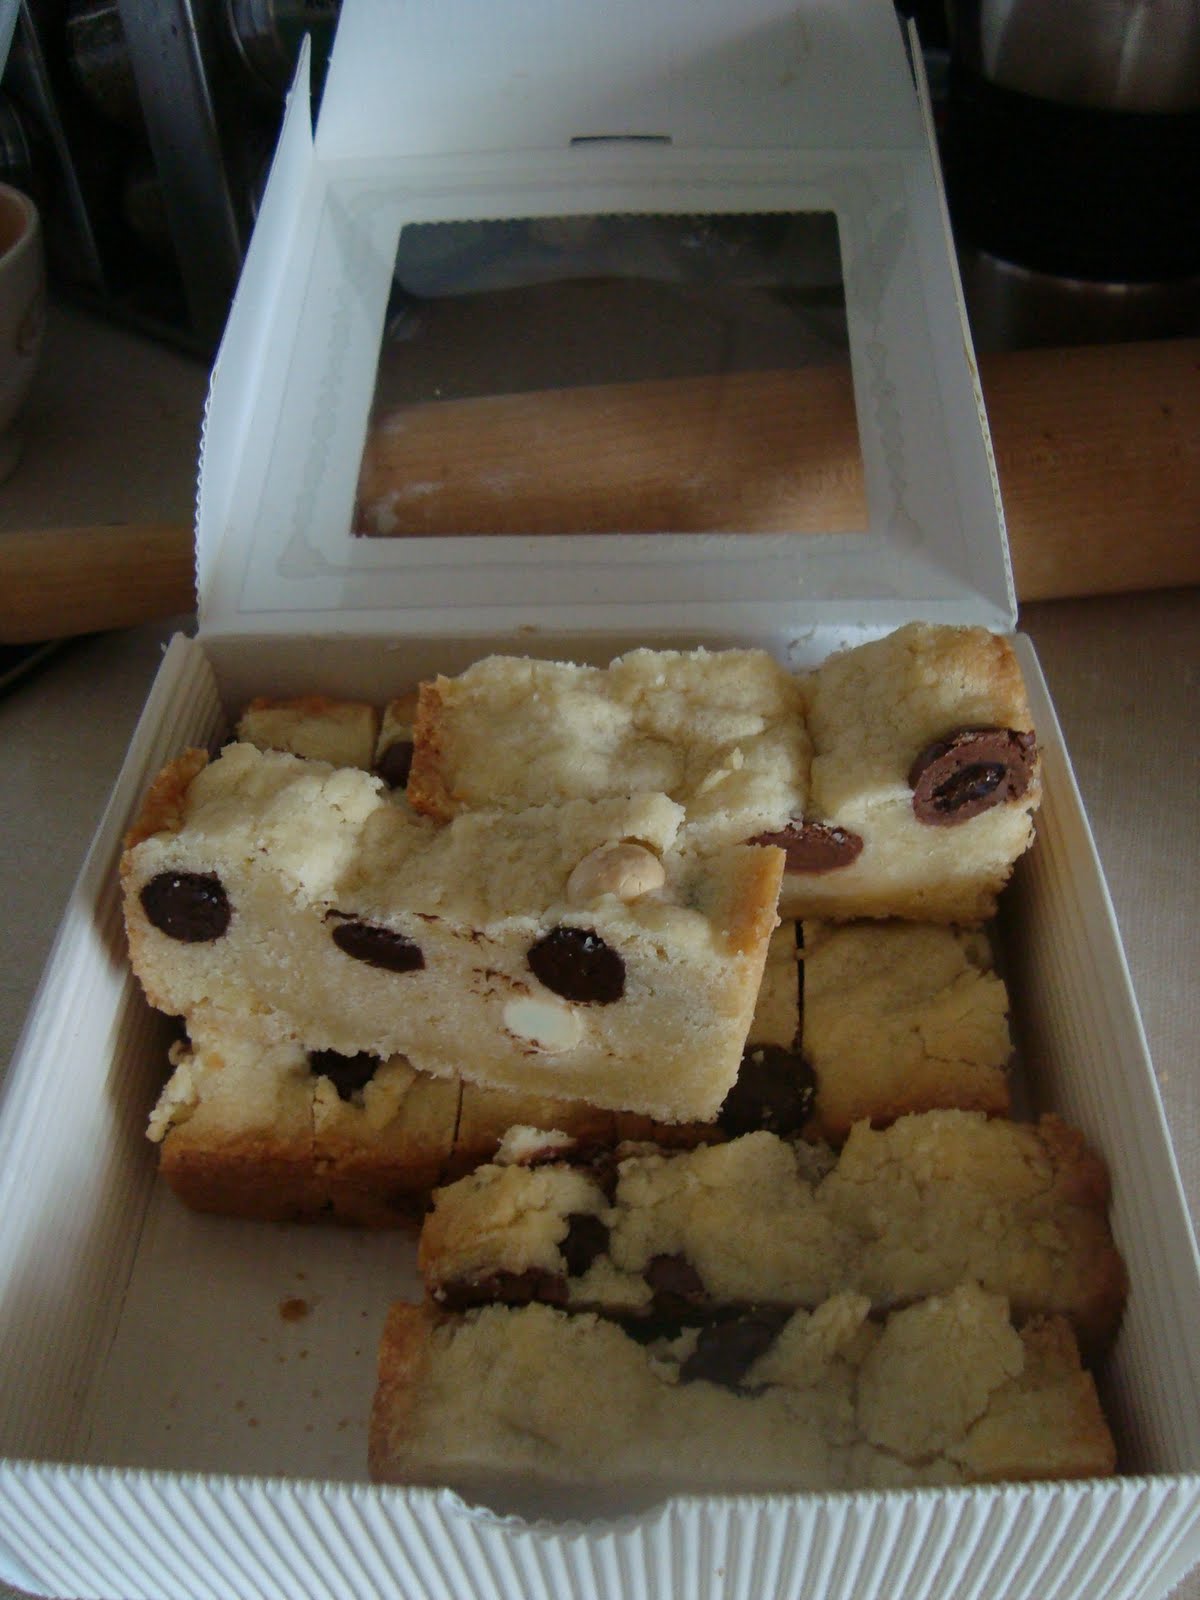
I forgot to take a picture (truth: I did take a picture but the picture is of the deserts I had put in my purse to take home) of the amazing mouses that were offered. They had raspberry and triple chocolate among a few others.
 
Also very tasty were the choux pastries from Popelin.
They had blueberry, lemon, and ice wine flavours. All 3 were to die for but the lemon might have been my favourite.
This was also where I broke my wine glass, trying to set it on a non-ledge so I could fill my grubby little hands with pastries.

 
Me, esentially:
 
 
All in all, it was a fantastic night that I would highly recommend checking out. Tickets run a bit on the pricey side but you certainly fill your tummy with wonderful foods and it's an opportunity to get drunk in the classiest of fashions.
 
 Plus the Distillery District is just beautiful.


Monday, April 30, 2012

Fun with Puff Pastry

Saturday night was my friends' Stag & Doe and it was a success.
The games were fun, the company was great, and the food was plentiful.
My contribution (food-wise) consisted of things I could do with puff pastry.
I went with the tried and true brie and balsamic red pepper jelly combo that I used for my friends' engagement party, and by request I made apple and brie also. I changed it up a bit though and made apple and brie turnovers rather than on puff pastry squares.
I also made the always declicious pizza-esque tomato, basil, and cheddar puff pastry tart.


To keep the middle pieces from becoming so soggy that you can't lift them off the pan, bake the puff pastry for a few minutes before adding the toppings. Then, once the cheese is melted and the edges gently browning, cut the tart into peices, seperate them, and bake them again for a few minutes.


These were a good idea. They're a good idea for any party where you know you'll be in the company of brie lovers.

Anyway that's it for now - if you want to get puff pastry crazy I highly recommend it. You can go sweet or savoury and use practically any combination of flavours and ingredients you want.
Some day I'll try to make my own puff pastry. It's a super intense process ... so, one day.
Not today.

Wednesday, August 17, 2011

Engagement Party Hors D'oeuvre

A little while ago I posted some of the food items I made for my birthday party. One of those was the pear and camembert on puff pastry hors d'oeuvre.
My best friend and her fiance are hosting their engagement party this Saturday.
And having attended my birthday, they asked if I would make those hors d'oeuvres for the party and of course I jumped at the chance to help out my friend and to spend some time in the kitchen playing around with flavours.
While they specifically requested the pear & camembert I couldn't stop thinking about what other combinations I could work with. After getting the go-ahead to get a little creative this is what I've come up with.
Keep in mind all of these will be lightly melted on puff pastry squares.

1. Insalata Caprese - Tomato, Buffalo Mozzarella & Basil


This flavour combination is savoury and delicious. Perhaps some olive oil or balsamic vinegar to drizzle on top?

2. Peaches with Honey-infused Ricotta


Ricotta and peaches go so well together and I'm thinking tha I'll stir honey into the ricotta before I spoon it over the peach slices. This will be the sweet to the insalata caprese's savoury.

3. Pear & Camembert or Brie


I know it went over well last time and it was requested so I won't disappoint.

4. Brie and Balsamic Red Pepper Jelly

I forgot to go take a picture of the jar but I got a jar of this amazing jelly from friend and food blogger extraordinaire Ginger Rose. The jelly is sweet but it also has this bite that makes you want a second taste.
Baked on top of some brie this might be the favourite of the hors d'oeuvre tray!

If you have any other flavour pairings that you think would be good to add to this list please let me know!

Tuesday, August 9, 2011

Hot Spinach Dip

I'm very lucky because my best friend not only takes me to amazing concerts, she also makes insanely good cakes.
Case in point: my birthday cake this year!

A red velvet Chanel purse.
Might even be better than the real thing!
This cake is deeeeelicious and it's slowly being devoured in an effort to make it last longer.
Since I love parties and party planning, I came up with some ideas for appetizers.
One is pretty simple and for it you need only 3 ingredients.
Pear & Camembert on Puff Pastry.
The picture doesn't do it enough justice.
I also made a small desert table, knowing there would be a cake and not wanting to have a ton of stuff left over.

Earl Grey tea cookies, banana chocolate chip mini-muffins, and smores-pops.

I also made a hot spinach dip. I had found the recipe while I was lookig for something to serve as an appetizer at the fam-jam but we had so much food we decided to skip it.

Hot Spinach Dip
(Courtesy of Martha Stewart)


1. Preheat oven to 425 degrees. In a large pot heat 2 tbsp olive oil. Add in 1 medium onion, diced, 2 cloves of garlic, minced, and cook for about 5-8 minutes until lightly browned.

2. Add 2 pounds of spinach (I used 1 frozen package) and cook until completely wilted (or no longer frozen), about 5-8 minutes. Transfer to a collander and press to release extra water.

3. In the same pot, warm 1/2 cup milk over high heat. Add in 1 pkg cream cheese and whisk until melted, about 3 minutes. Add the spinach back in, along with 3 dashes each of worcestershire sauce and hot sauce, 1/4 cup shredded mozarella (I used marble cheddar), and salt and pepper. Pour into a lightly oiled baking dish and sprinkle the top with 1/2 cup shredder mozarella cheese.

4. Bake for 20-25 minutes, until the cheese on top is bubbly and golden brown. Serve with whatever you plan to dip into it.

Martha's Homemade Hummus

Today's post will be a two-parter because I already uploaded pictures for today's recipes but I also told my best friend that I'd find her a good hummus recipe for her engagement party.
Going to one of the only sources I trust I found a relatively simple recipe for hummus.
The only ingredient that might be somewhat tricky to locate is tahini but I've seen it so Tracy if you can't find it - let me know!

Martha's Homemade Hummus


1. Reserving 1/4 cup of the liquid, drain and rinse 2 cans of chickpeas. Place chickpeas in a food processor and add in the liquid, 1/3 cup fresh lemon juice, 1/4 cup tahini (be sure to stir it well before adding it in), 2 chopped cloves of garlic, 1/8 tsp cayenne pepper, and 1 1/4 tsp salt.  Process until smooth.

This recipe can be stored in an airtight container in the fridge for up to a week.
If you want to make this look fancier when you serve it, jazz it up like in the picture above. Serve the hummus in a bowl and drizzle some olive oil into the centre.

Saturday, September 11, 2010

Jamie's M.A.P. Salsa

In addition to the 2 loaves of pumpkin seed ciabatta bread I made this afternoon, one for us and one for Siobhan's gift basket (see below)


(P.S. Suuuuuuuper psyched at how well this ciabatta came out! Look at all them air pockets!)
I also created a recipe for the best fruity salsa you will ever have in your entire life.
I take full credit for this recipe because it's delicious!
I think it's a perfect companion to tortilla chips, toasted pita or naan wedges, atop toasted baguette rounds, or on hamburgers. Heck this salsa would even go well as a side salad all on it's own!
I also have decided to abbreviate it and call it M.A.P. Salsa rather than Mango-Avocado-Peach salsa. And I like MAP better than PAM because, like a map, the fruits represent different areas of the world.
So deep, I know.
Jamie's M.A.P. Salsa


This recipe is very simple, involving 2 steps, 10 ingredients, 1 bowl, and 5 minutes of your time.
You'll need:
  • 1 Avocado (to tell if you're buying a ripe one, give it a squeeze. The firmer it feels the less ripe it is).
  • 1 Peach
  • 1 Mango
  • 1/2 Red Pepper
  • 1/4 Red Onion
  • 1 tbsp lemon juice
  • 1 tbsp lime juice
  • 1 tbsp lime zest
  • 1 tbsp cilantro, chopped (fresh or frozen cubes will work better than dried cilantro here)
  • 1 tsp each of salt and ground black pepper
1. Cut avocado, peach, and mango into bite sized cubes. Finely dice the onion and dice the red pepper. Toss all into a bowl.
2. Zest the lime and add to the bowl. Squeeze the juice of half of one lemon and half of one lime into the mix. Sprinkle on salt, pepper, and mix in the cilantro. Toss to coat. Serve or store in an airtight container until ready to serve!
If you aren't good with knife skills or hate cutting slimy slippery avocados, let me show you an easy way to cut avocado into perfect sized pieces fast.
Cut the avocado in half lengthwise and twist in the sides in opposite directions until you end up with two halves.
Carefully (!) chop the knife into the avocado pit with a bit of force. The knife will stick into it and will pull it right out of the other half of the avocado.
Without removing the outer skin, make vertical and horizontal cuts in the avocado to give you the desired sized cubes.
Push on the skin to fan out the cubes. Some will fall out on their own. For the rest, gently run your knife under the skin to free the remaining cubes.
See Below...
The M.A.P. Salsa (all but the one spoonful I saved for myself) is now jarred up and in the fridge, ready to go into the gift basket tomorrow.
I'll jazz up the jar a bit in the morning.


The gift basket so far is really coming along.
I was browsing through the online LCBO magazine and found a bottle of wine called "Life is Good". I knew I had to find it - and I did! I hope she opens it tomorrow so I can try it (ha-ha-ha only I'm not really kidding). I'm a sucker for an interesting label and this wine's got one. Also, with every purchase, the wine company donates a percentage to an organization that works to make the cities greener, more liveable places.
So cool label and good cause.

Quick side note: if you like the LCBO's free Food & Drink magazine I strongly suggest you go pick one up asap. They come with a free sample of popcorn!
SPICY NACHO FLAVOURED POPCORN!
I made my sister get a copy of the magazine too just to have two popcorn samples.
One bag is gone. Verdict? Delicious.

Here's how my gift baske is shaping up thus far:


Former Tiffany & Co. bag, now housing meringues of a similar colour.
Under the Tiffany bag we've got Soy Butter jam thumprint cookies (recipe & pictures tomorrow).
The 'S' jar is the oven dried tomatoes.
And the wine is hiding in there behind the pumpkin seed ciabatta.
I heard once that pumpkin seeds are also called pepitas. Can anyone verify this for me?

Slash I'll wikipedia it in a few.

Nice quiet night, just me, my hot chocolate, baked goods all around, and many more episodes of How I Met Your Mother.


Thursday, September 2, 2010

Blue Cheese Pop-Overs

Yesterday marked 2 years of cohabitation between me and John.
It's crazy that we've been living together for that long already!
It's been a wonderful two years and if these two are any indication of how things are going to play out in the future, well....I think we're in for one heck of a fun ride.
Photo taken from pigeon-master.livejournal.com

Since we both kind of forgot that yesterday was our move-in anniversary (oops) we're making a nice chicken pasta with buffalo mozarella for dinner. And because pasta isn't enough carbs, I put another recipe from the Martha Stewart Hors d'eouvres Handbook to the test:


Blue Cheese Pop-Overs

Though mine didn't really get the nice pop-over look on the top, they are very light and airy AND even though I added a ton more blue cheese than the recipe called for (I had almost a full package to try and use up, left over from the Pommes Annette) the taste is subtle. I think even blue cheese-ophobes could be persuaded to give these at least one thumb up.
To make these pop-overs:
1. In a bowl, whisk together 2 eggs, 1 cup milk, 1 cup flour, 2 tbsp melted butter, 1 tsp salt, and 1 tbsp black pepper. Whisk until all of the lumps have smoothed out.
2. Add in 1 1/4 ounces of blue cheese (I used about 3/4 cup worth of cheese cut into very small cubes). Whisk again until smooth then put the batter in the refrigerator for a minimum of 2 hours and preferably overnight.
3. Once chilled for several hours, preheat the oven to 425 degrees. Spoon batter into well greased mini muffin tins. Bake the pop-overs for 15-18 minutes or until the tops begin to brown slightly.
4. Allow them to cool slightly, remove from the pans, and serve while still warm.

I'm off to go finish up this pasta so I will post again tomorrow :)
P.S. I got a denim shirt yesterday! It's glorious. I found it at H&M for a reasonable price and while there I also found an amazing cocktail ring with a big black stone that rotates! It's stylish and fun to play with.
Win-win.

Friday, August 27, 2010

Pommes Jamie & Sauteed Garlic Broccoli Rabe

For my birthday I received Martha Stewart's Hors d'oeuvres Handbook.
I spent an evening with my bedside light on, scouring the photo pages, post-it tabs in hand.
I've tabbed quite a few pages and kind of want to do a Julie & Julia inspired cook-my-way-through-this-book challenge.
Eventually.
I came across one in particular that I was anxious to try: Pommes Annette.
The recipe calls for goat cheese to be layered between slices of potato, with thyme, black pepper and salt flavourings.
I had been kind of weirdly craving blue cheese so I decided to switch the goat cheese for blue cheese, and switch the thyme for rosemary because I truly think it is a natural partner for any and every potato dish.
So, may I present to you
Pommes Jamie


They look GOOD, right?
They are.
Here's how you can make your own Pommes Jamie or, if you're not a blue cheese fan, Pommes Annette with goat cheese.
1. Preheat the oven to 350 degrees. Thinly slice potatoes so that they will fit into muffin cups. Brush some melted butter on the bottom of each muffin cup and place a small bit of rosemary on top.
2. Place a slice of potato directly on top of the rosemary. Place a small bit of blue cheese on top of the first potato slice and then place another slice on top of the cheese, pressing down slightly. Make sure to use enough cheese so that the potato slices will stick together. If you want to make true Pommes Jamie, alternate with white and red potato slices.

3. Continue to layer until you reach the top of the muffin cup - about 4 slice sof potato. Brush the top slice with melted butter. Place another muffin baking pan on top of the one with the potatoes and press down. This will ensure that the potatoes compress while baking and it will make them hold together better. Bake for about 30 minutes and then remove the top muffin pan. Bake for another 10 minutes if necessary or until the potatoes start to turn a nice golden brown colour.

4. Carefully remove the potato stacks from the pans and then turn them so that the rosemary side is up. Then serve and bask in the glow of awe and respect from your guests :)


The two other vegetable side dishes I made last night were butter-roasted yellow and green zucchini, and sauteed broccoli rabe.

Sauteed Garlic Broccoli Rabe


This is beyond easy to make and it's tasty and good for you!
1. In a wok, heat 3-4 tbsp of olive oil over medium heat.
2. Thinly slice 3 cloves of garlic and add them to the oil.
3. Cut the stems off of the broccoli rabe and toss in the oil and garlic. Turn the heat down to medium-low or low (depending on how soon you want them to be done) and cover the wok with a lid. Allow broccoli to steam and become soft. Make sure to remove the lid and toss the greens every so often to prevent them from burning and sticking to the bottom of the wok.
4. Remove from heat, serve, and enjoy!


That's it!
I've finished mixing all of my ingredients for the ciabatta loaf and in another hour it will have finished rising and will be ready to go in the oven.
I'm going to do two seperate loaves, one just a straight up ciabatta, and the other with thinly sliced potatoes, parmesan cheese, and rosemary.

I'm on a potato-rosemary kick apparently.
This bread was what originally got me thinking about potatoes and rosemary so I think that's what inspired Pommes Jamie ;)

I'm also heading to the CNE at some point today - hopefully in a few hours so I can get this bread baking first!

Wednesday, August 25, 2010

A Busy Evening in the Kitchen

I was busy busy busy last night, slaving away in the kitchen to get the stuff made for the gift basket and for the staff.
I say slaving away but I'm actually more relaxed when I'm in the kitchen mixing up batters and rolling out puff pastry.
Poor John is absolutely exhausted these days. He gets up before the sun (and me) and leaves to be picked up for work anywhere between 6:30 and 7:00 am. When he kissed me goodbye at 6:30 this morning I thought, 'thank goodness I have another hour and 15 minutes before my alarm'. Then I rose, hit the treadmill and ran - are you ready for this? - 8.5 miles!
EIGHT AND A HALF MILES!
That's the furtherst I've ever run in one go.
That half marathon is only a month away so this progress makes me happy.
Anyway, while John was sailing away in a wooden shoe to fish for the herring fish with his nets of silver and gold last night on the couch, I was being the busy baker bee.
I rolled out half of the puff pastry for the straws.
Parmesan and Black Pepper Puff Pastry Straws
1. Preheat oven to 425 degrees. Roll out the puff pastry on a lightly floured surface into a rectangle.
2. Brush the puff pastry with a lightly beaten egg. Sprinkle with black pepper and grated parmesan cheese.
3. Fold the puff pastry in half, sealing tightly. Roll out the puff pastry again, as close as possible to the same size rectangle as before. Cut vertically into thin strips then twist.
4. Place straws on a parchment-lined cookie sheet, pressing ends onto the parchment to prevent them from untwisting. Sprinkle the straws with more black pepper and parmesan. Bake for 12-14 minutes, making sure to rotate the pans halfway through.
The straws are so easy and they're really good.
Next up:
Triple Chocolate Espresso Bean Cookie Bars

For these I used Martha's basic recipe for her chocolate chip cookie bars but substituted white, dark, and milk chocolate coated espresso beans for the chocolate chips. I also didn't have brown sugar so I used granulated only.
1. Preheat oven to 350 degrees and lightly grease a loaf pan (a cookie sheet isn't deep enough to give you that nice bar shape).
2. In a large bowl, cream 1 1/2 cups of butter, 1 cup granulated sugar, and 1 1/2 cups brown sugar. Beat in 2 eggs and 1 tbsp vanilla and mix until combined.
3. Mix in 4 cups flour, 2 tsp baking soda and a pinch of salt. Mix in chocolate chips (as much or as little as you want - I used half of what was called for in this recipe and I used about 1 cup of chocolate beans so you might want to aim for about 2 cups here),
4. Put dough into the loaf pan and press down to make sure it's packed in. Bake for 40-45 minutes until the top is golden brown. Let cool before removing from pan. Cut into bars and store in an airtight container or eat!

Lastly, I baked the cupcakes for the shark cupcakes I'm going to finish decorating tonight.
I couldn't find malted milk powder and since a 500 mL bag of milk powder was almost $9 I experimented with my own malted chocolate cupcake mix.
I used Martha's recipe for a basic chocolate cupcake and added 1 1/2 cups of crushed chocolate malt balls. To crush them I placed them in a ziplock bag, took them out on the balcony and took a hammer to them. It's really fun.
Especially if you can do it in your PJs, crouched on the ground, pounding those malt balls ever so quietly directly in front of the window into the bedroom where your boyfriend is fast asleep.
If you're going to add your own chocolate malt balls like I did, I'd recommend adding maybe a bit more oil than the recipe calls for. I think I dried it out a bit.
Malted Chocolate Cupcakes
1. Preheat oven to 350 degrees. Place muffin cups into muffin tins - you'll need about 18.
2. In a bowl, mix together 1 1/2 cups flour, 3/4 cup cocoa powder, 1 1/2 cup sugar, 1 1/2 tsp baking soda, 3/4 tso baking powder, and 3/4 tsp salt.
3. Add in 2 large eggs, 3/4 cup warm water, 3/4 cup buttermilk, 3 tbsp vegetable oil (maybe use 5 tbsp), and 1 tbsp vanilla extract. Stir in 1 1/2 cups of crushed chocolate malt balls like whoppers or malteasers.
4. Pour the cupcake mixture into the muffin cups, filling to about 3/4 of the way up. Bake for 20 minutes and then let cool.

Just an update before I get ready for work -
Algonquin trip has been set!
The weekend of September 17-19 I'll be heading out in a canoe with a paddle, a tent, some warm clothes, and a bag of wine to enjoy the beauty of nature.


...and hopefully to see a moose.

Monday, July 26, 2010

Mango Salsa + Countdown to the Fam-Jam

Countdown to the long weekend cottage fam jam: 4 days.
Four more days (of work, no less) then it's off to the lake!
Cannot wait to try out the new noodle hammock chair I bought at the dollarstore.


For the dinner I'm helping to make on Saturday, I've come up with a cute favour-ish idea.
It's more of an interactive type thing than a cutesy gift but it'll depend on whether I find what I'm looking for at the dollarstore on Friday morning.
It will involve 2 things:
1. Spice jars

2. Scrolled paper
and on the scrolls will be some trivia questions to get a bit of a game going during dinner.
I think it's a cute idea.


For an appetizer we've decided upon tortilla chips and a mango salsa so because I haven't posted too many recipes as of late, here is a Martha recipe for mango salsa that I'll be bringing to the lake with me

Mango Salsa

1. Peel and cut 2 medium mangoes into 1/4 inch cubes and place in your salsa serving bowl.
2. Add to the mango 1 medium seeded and minced jalapeno pepper (leave seeds in if you want it spicier), 1/4 cup roughly chopped cilantro, 2 tbsp lime juice, 1/2 tsp salt, 1/4 tsp ground black pepper, and 1 tbsp minced shallot.
3. Serve with tortilla chips and enjoy!

Wednesday, May 19, 2010

Happy (Belated) Birthday to a Wonderful Aunt!


It was my Aunt Wendy's birthday on Monday and I didn't get a chance to make her a happy birthday blog on her actual day (confession: the one that I posted on Monday was written on Saturday and delayed). And since she is a very active follower of my blog it's only appropriate that she get the birthday shout out she deserves!
So!
HAPPY BIRTHDAY AUNT WENDY!!!
I hope you had a fabulous day and I know you had some very good news to celebrate this year as well! Congratulations there will be in order once I see it officially announced via the all mighty facebook haha.
My Aunt is incredible - she is probably the craftiest person I know, she can organize events like nobody's business (see last summer's cottage fam jam for a perfect example). She is a very loving and devoted mother to her sons and daughters-in-law, and she is a beautiful grandmother - though you'd never guess she was old enough to have grandchildren by looking at her! She feeds my love of all things Christmas and has been one of the biggest supporters of this blog from the very first post.
For inspiring and motivating me to keep finding and trying and sharing new recipes
THANK YOU!
And HAPPY BIRTHDAY!
So, Wendy, I decided that in honour of your birthday I am going to post a recipe that I always associate with you. In fact it even carries your name.
The Wendy Dip

(Photo not of actual dip, rather it was stolen from a google search)

To make this dip:

  • Mix together 1 block of cream cheese, softened, and 1 small tub of sour cream (about 2 cups).
  • Mix in 1/2 pkg of taco seasoning. Spread the mixture out in a serving bowl.
  • On top, sprinkle diced tomato, green onion, and grated cheddar cheese.
  • Serve with tortilla chips and watch how fast this disappears!

***If desired you could also add black olives or even ground beef.

I'll post again tomorrow cause I have the morning off.

Happy Birthday again Aunt Wendy! Sorry I missed you on the actual day!

Love you :)

Friday, January 15, 2010

Weekend Time!

Hallelujah it is Friday!
It has felt like a very long week so I'm ready for a few days of rest.
Doing a little entertaining for John's mom's birthday tomorrow evening so I stopped off at the grocery store to pick up some stuff to make appetizers. Below you will find everything you need to make some tasty little sandwiches (open face):

  • A loaf of ciabatta bread
  • Bocconcini cheese
  • Tomatoes
  • "Alfalfa" sprouts
  • Labneh (it's a middle eastern strained yogurt and tastes like a cross between sour cream and cream cheese)

My plan (and I already tried it out. Results are in: it's good) is to cut open the ciabatta, spread both sides with the labneh, then sprinkle on the alfalfa sprouts. Thickly slice the tomatoes and place on the sprouts, finishing the sandwich with peices of bocconcini cheese. So good. You can also drizzle some olive oil over the cheese if you want as it's a very bland cheese. I find the labneh and the tomato add enough flavour without the oil.

I have a confession: I never donated the Bad Sweater Party money to the Daily Bread Food Bank :( I brought the money to my parents house on Christmas Eve because John and I dropped off the canned goods and tried to give them the money there but we were told we had to do it somewhere else. I forgot to get the money back from my parents until about 2 weeks ago and then again completely forgot to donate slash in my defence I work a lot and my free time was dedicated to completely zoning out. But regardless...

On Wednesday I finally donated the money. But like I said before, not to the Daily Bread Food Bank. I asked John's permission for a change of donor as he was my partner in fundraising. I donated the $300 we raised to the Canadian Red Cross Haiti Relief Fund.

The situation in Haiti is devastating and I think sometimes we need to step back from our priveleged lives and do what we can to help those less fortunate. So many of these people have lost everything. What would you do in their situation?

Sorry if that sounded like I was guilting you into donating - definitely wouldn't do that! If you plan to donate here are some places you can (safely) do so:

Canadian Red Cross

Wyclef Jean's Yele Haiti Organization (I've tried numerous times to get on this site but it's always down...I hope because the volume of people logging on and donating is massive)

ONExONE

Oxfam, Save the Children Canada, Care

Unicef Canada

Just to name a few.

Have a wonderful weekend :)